Logto คือทางเลือกแทน Auth0 ที่ออกแบบมาสำหรับแอปและผลิตภัณฑ์ SaaS ยุคใหม่ โดยมีทั้งบริการ Cloud และ Open-source เพื่อช่วยให้คุณเปิดตัวระบบการจัดการเอกลักษณ์และการเข้าถึง (IAM) ได้อย่างรวดเร็ว สนุกกับการยืนยันตัวตน (การยืนยันตัวตน), การอนุญาต (การอนุญาต), และการจัดการหลายผู้เช่า ครบจบในที่เดียว
เราแนะนำให้เริ่มต้นด้วย tenant สำหรับการพัฒนาแบบฟรีบน Logto Cloud เพื่อให้คุณสามารถสำรวจฟีเจอร์ทั้งหมดได้อย่างง่ายดาย
ในบทความนี้ เราจะพาคุณไปทีละขั้นตอนเพื่อสร้างประสบการณ์ลงชื่อเข้าใช้ Line (การยืนยันตัวตนของผู้ใช้) อย่างรวดเร็วด้วย iOS (Swift) และ Logto
ข้อกำหนดเบื้องต้น
- มี Logto instance ที่พร้อมใช้งาน ดู หน้าแนะนำ เพื่อเริ่มต้นใช้งาน
- มีความรู้พื้นฐานเกี่ยวกับ iOS (Swift)
- มีบัญชี Line ที่ใช้งานได้
สร้างแอปพลิเคชันใน Logto
Logto สร้างขึ้นบนพื้นฐานของการยืนยันตัวตน OpenID Connect (OIDC) และการอนุญาต OAuth 2.0 โดยรองรับการจัดการข้อมูลระบุตัวตนแบบรวมศูนย์ข้ามหลายแอปพลิเคชัน ซึ่งมักเรียกว่า การลงชื่อเข้าใช้ครั้งเดียว (Single Sign-On; SSO)
ในการสร้างแอปพลิเคชัน Native app ของคุณ เพียงทำตามขั้นตอนเหล่านี้:
- เปิด Logto Console ในส่วน "เริ่มต้นใช้งาน" ให้คลิกที่ลิงก์ "ดูทั้งหมด" เพื่อเปิดรายการเฟรมเวิร์กของแอปพลิเคชัน หรือคุณสามารถไปที่ Logto Console > Applications แล้วคลิกปุ่ม "สร้างแอปพลิเคชัน"
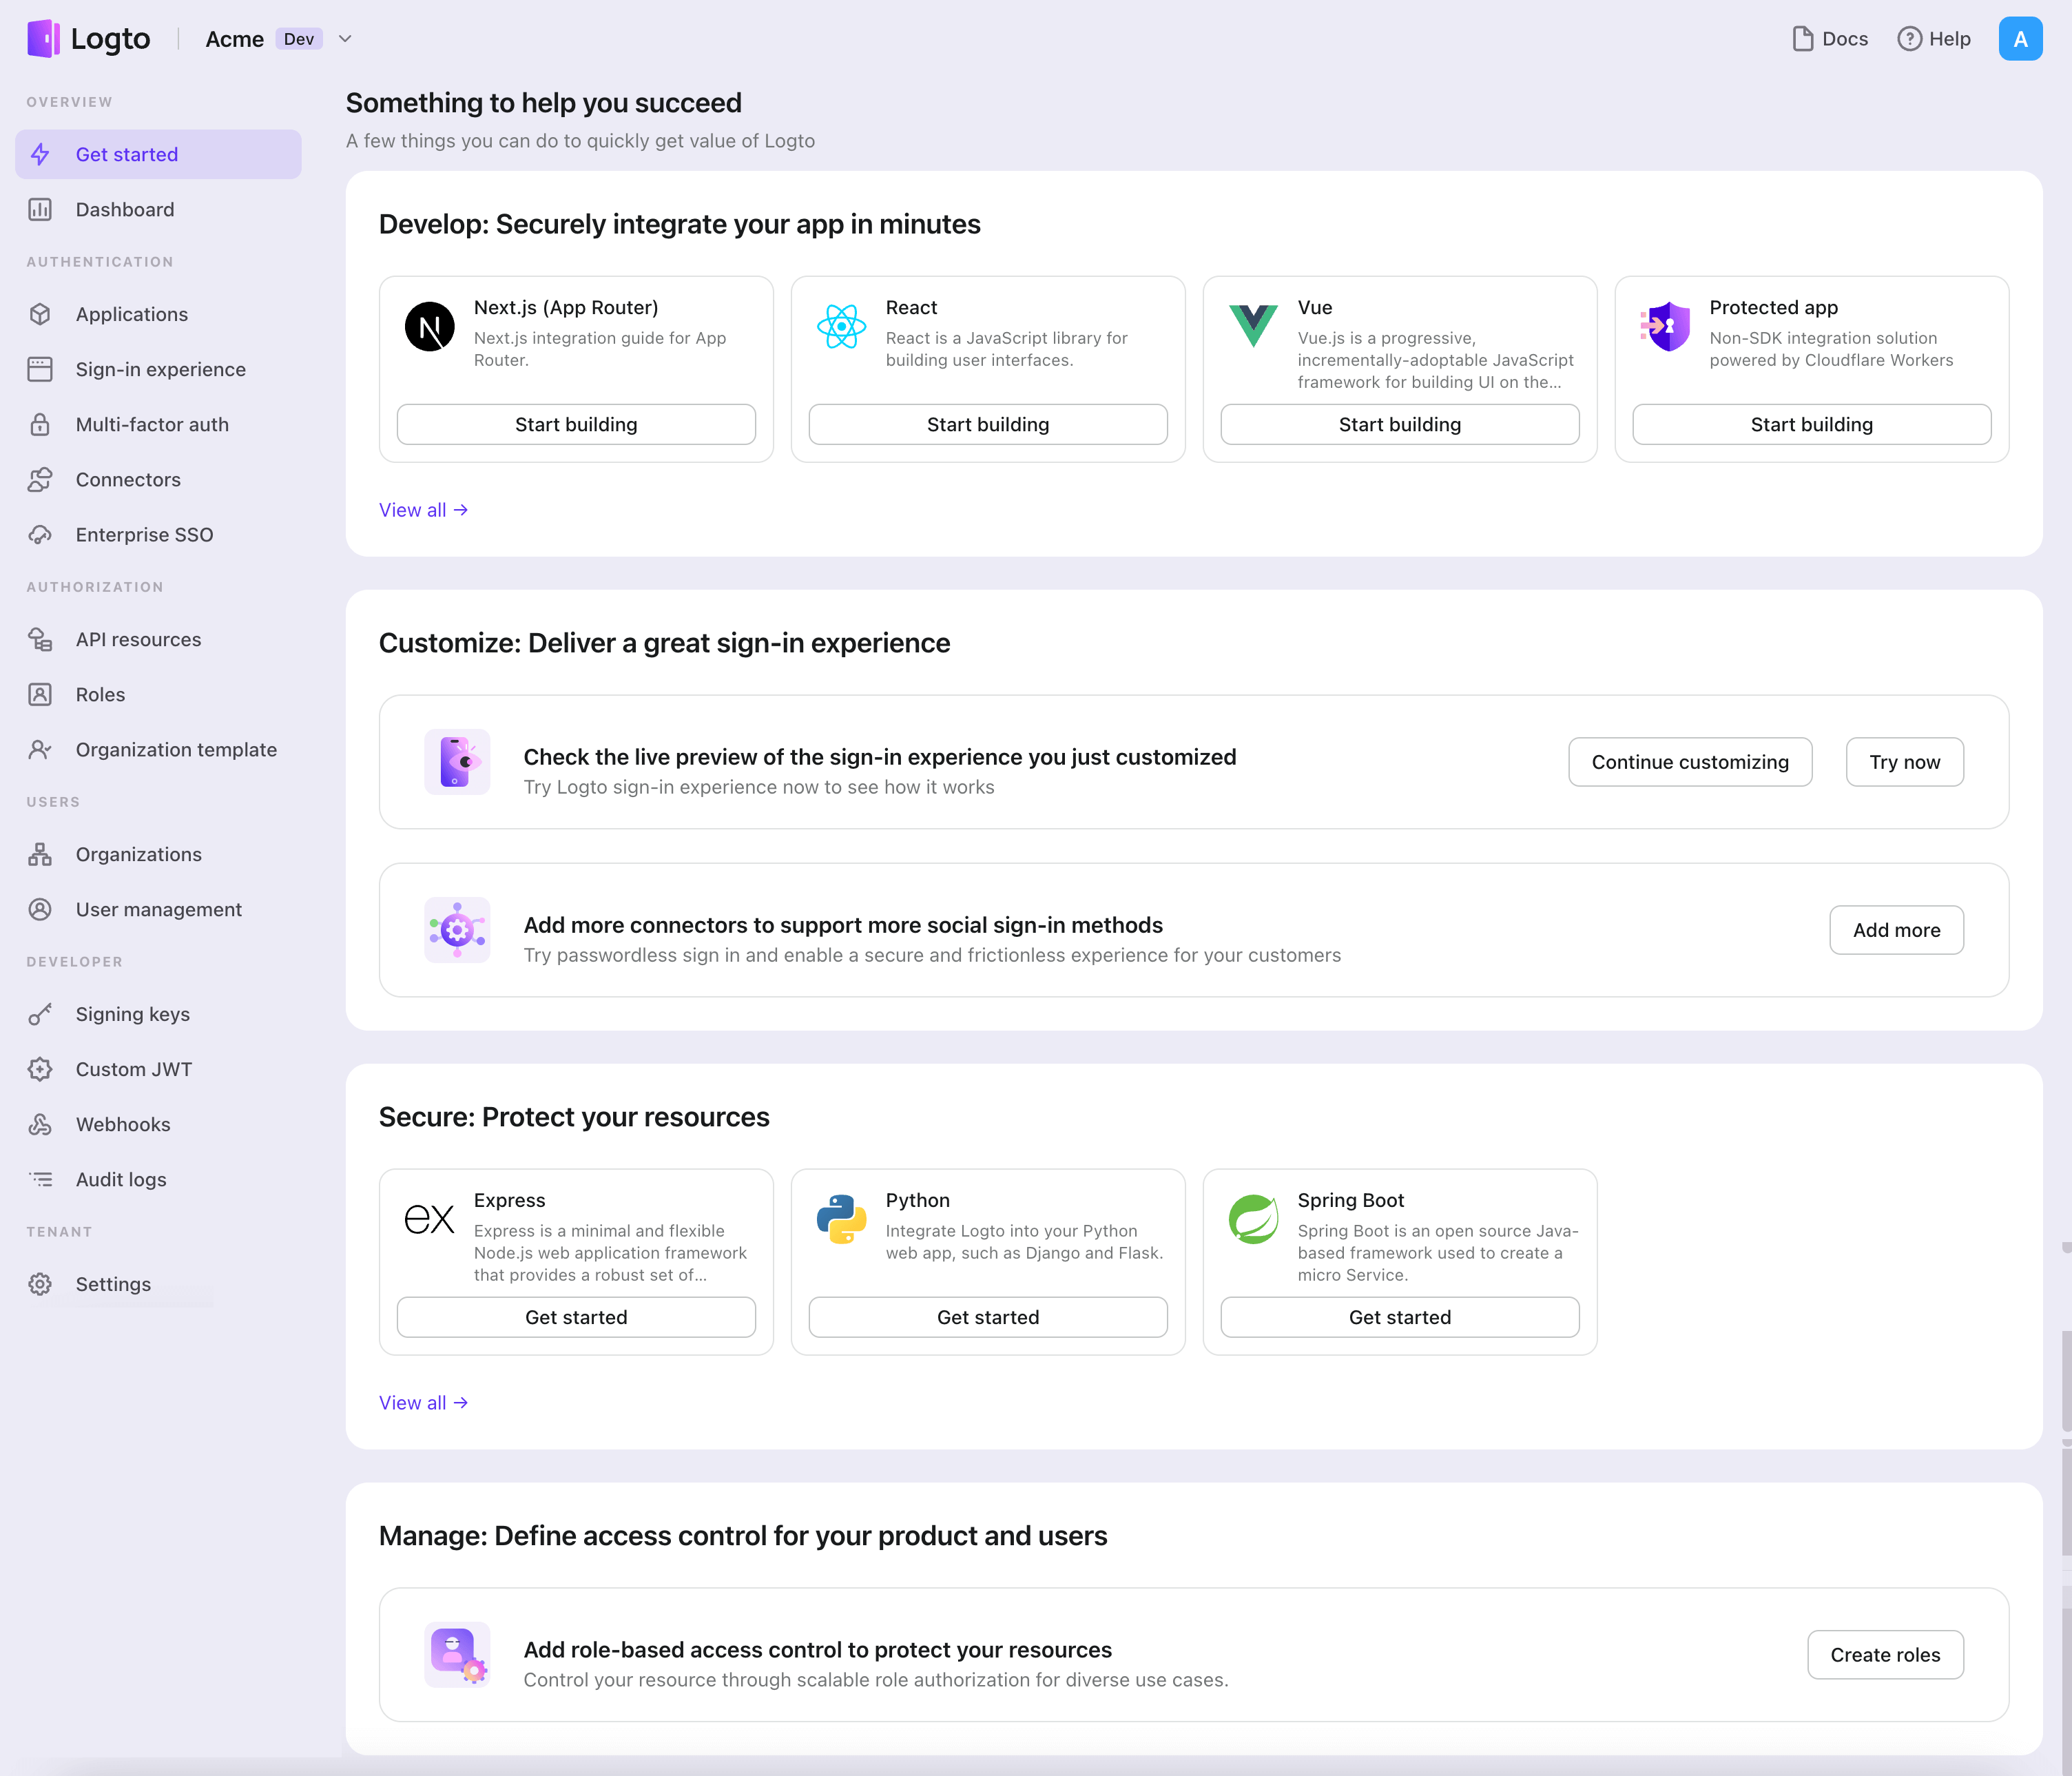
- ในหน้าต่างที่เปิดขึ้น ให้คลิกที่ส่วน "Native app" หรือกรองเฟรมเวิร์ก "Native app" ทั้งหมดที่มีโดยใช้ช่องกรองด่วนทางซ้ายมือ จากนั้นคลิกที่การ์ดเฟรมเวิร์ก "iOS (Swift)" เพื่อเริ่มสร้างแอปพลิเคชันของคุณ

- กรอกชื่อแอปพลิเคชัน เช่น "Bookstore" แล้วคลิก "สร้างแอปพลิเคชัน"
🎉 เยี่ยมมาก! คุณเพิ่งสร้างแอปพลิเคชันแรกของคุณใน Logto คุณจะเห็นหน้าข้อความแสดงความยินดีซึ่งมีคู่มือการเชื่อมต่ออย่างละเอียด ให้ทำตามคู่มือเพื่อดูประสบการณ์ที่จะเกิดขึ้นในแอปพลิเคชันของคุณ
ผสานรวม iOS (Swift) กับ Logto
เพิ่ม Logto SDK เป็น dependency
The minimum supported iOS version of Logto Swift SDK is iOS 13.
Logto Swift SDK comes in two major versions:
- v1: Opens the sign-in experience in an embedded WebView, which is required by the native social plugin targets, but does not support passkey sign-in (WebView does not support WebAuthn, the underlying standard of passkeys).
- v2 (beta): Opens the sign-in experience in
ASWebAuthenticationSession(the system browser), which unlocks passkey sign-in and shares the browser session. Note that v2 removes the native social plugin targets; social connectors still work through the browser. If you depend on the native WeChat or Alipay SDK handoff, stay on v1.
This guide covers both versions. Choose your version in the tabs below, and the choice will be kept in sync throughout this guide.
Use the following URL to add Logto SDK as a dependency in Swift Package Manager.
https://github.com/logto-io/swift.git
Since Xcode 11, you can directly import a Swift package w/o any additional tool.
When Xcode asks for the package version, choose the version you want to integrate:
- v2 (beta)
- v1
v2 is released as 2.0.0-beta.x prereleases until GA. Use 2.0.0-beta.1 or the latest 2.0.0-beta.x prerelease as the version. During beta, we recommend selecting the prerelease explicitly instead of relying on a normal version range to pick it automatically.
If you use Package.swift directly:
.package(url: "https://github.com/logto-io/swift.git", exact: "2.0.0-beta.1")
Use the latest v1 release as the stable line. The latest v1 version is 1.2.0.
If you use Package.swift directly:
.package(url: "https://github.com/logto-io/swift.git", from: "1.2.0")
We do not support Carthage and CocoaPods at the time due to some technical issues.
Carthage
Carthage needs a xcodeproj file to build. We will try to find a workaround later.
CocoaPods
CocoaPods does not support local dependency and monorepo, thus it's hard to create a .podspec for this repo.
เริ่มต้น LogtoClient
เริ่มต้นไคลเอนต์โดยการสร้างอินสแตนซ์ LogtoClient ด้วยอ็อบเจกต์ LogtoConfig
import Logto
import LogtoClient

let config = try? LogtoConfig(
  endpoint: "<your-logto-endpoint>", // เช่น http://localhost:3001
  appId: "<your-app-id>"
)
let client = LogtoClient(useConfig: config)
โดยปกติ เราจะจัดเก็บข้อมูลรับรอง เช่น โทเค็น ID (ID Token) และ โทเค็นรีเฟรช (Refresh Token) ไว้ใน Keychain ดังนั้นผู้ใช้จึงไม่จำเป็นต้องลงชื่อเข้าใช้อีกเมื่อกลับมา
หากต้องการปิดการทำงานนี้ ให้ตั้งค่า usingPersistStorage เป็น false:
let config = try? LogtoConfig(
  // ...
  usingPersistStorage: false
)
ลงชื่อเข้าใช้
ก่อนที่เราจะลงลึกในรายละเอียด นี่คือภาพรวมประสบการณ์ของผู้ใช้ปลายทาง กระบวนการลงชื่อเข้าใช้สามารถสรุปได้ดังนี้:
- แอปของคุณเรียกใช้งานเมธอดลงชื่อเข้าใช้
- ผู้ใช้จะถูกเปลี่ยนเส้นทางไปยังหน้าลงชื่อเข้าใช้ของ Logto สำหรับแอปเนทีฟ ระบบจะเปิดเบราว์เซอร์ของระบบ
- ผู้ใช้ลงชื่อเข้าใช้และถูกเปลี่ยนเส้นทางกลับไปยังแอปของคุณ (ตามที่กำหนดไว้ใน redirect URI)
เกี่ยวกับการลงชื่อเข้าใช้แบบเปลี่ยนเส้นทาง (redirect-based sign-in)
- กระบวนการยืนยันตัวตนนี้เป็นไปตามโปรโตคอล OpenID Connect (OIDC) และ Logto บังคับใช้มาตรการรักษาความปลอดภัยอย่างเข้มงวดเพื่อปกป้องการลงชื่อเข้าใช้ของผู้ใช้
- หากคุณมีหลายแอป คุณสามารถใช้ผู้ให้บริการข้อมูลระบุตัวตน (Logto) เดียวกันได้ เมื่อผู้ใช้ลงชื่อเข้าใช้แอปหนึ่งแล้ว Logto จะดำเนินการลงชื่อเข้าใช้โดยอัตโนมัติเมื่อผู้ใช้เข้าถึงแอปอื่น
หากต้องการเรียนรู้เพิ่มเติมเกี่ยวกับเหตุผลและประโยชน์ของการลงชื่อเข้าใช้แบบเปลี่ยนเส้นทาง โปรดดูที่ อธิบายประสบการณ์การลงชื่อเข้าใช้ของ Logto
Configure redirect URI
- v2 (beta)
- v1
ไปที่หน้ารายละเอียดแอปพลิเคชันของ Logto Console เพิ่ม Redirect URI io.logto.app://callback แล้วคลิก "บันทึกการเปลี่ยนแปลง" (Save changes)
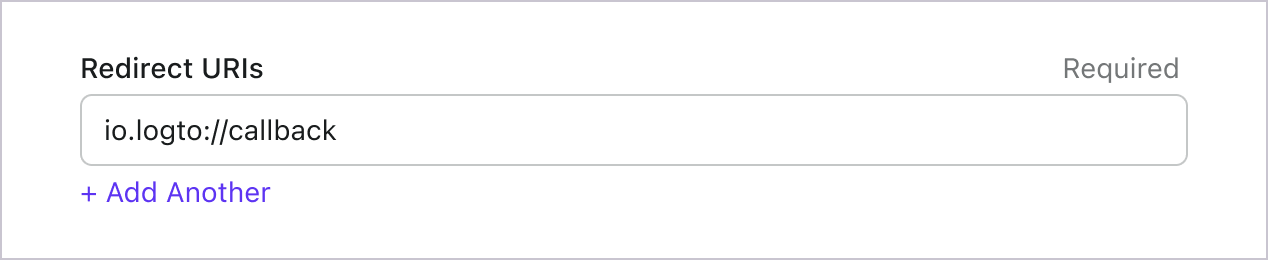
In v2, the sign-in experience opens in ASWebAuthenticationSession (the system browser), and the redirect is routed back to your app through OS-level callback matching. For a custom scheme redirect URI such as io.logto.app://callback, register only the scheme part (io.logto.app) in your app's Info.plist, then add the full redirect URI to your Logto application's Redirect URIs.
In Xcode, open your app target, select Info, expand URL Types, and add one entry with io.logto.app in URL Schemes. If you edit Info.plist directly, add:
<key>CFBundleURLTypes</key>
<array>
  <dict>
    <key>CFBundleTypeRole</key>
    <string>Editor</string>
    <key>CFBundleURLName</key>
    <string>io.logto.app</string>
    <key>CFBundleURLSchemes</key>
    <array>
      <string>io.logto.app</string>
    </array>
  </dict>
</array>
For the browser flow in v2, you do not need to call LogtoClient.handle(url:); that plugin handoff API was removed with the embedded WebView flow.
Use Universal Links instead of a custom scheme?
You can also use an HTTPS redirect URI such as https://example.com/callback:
- Add the Associated Domains capability to your app.
- Configure
webcredentials:example.comsoASWebAuthenticationSessioncan match HTTPS callbacks on iOS 17.4 and newer. - If the same URL should also open your app as a Universal Link outside the authentication session, configure
applinks:example.comand host a validapple-app-site-associationfile for the domain and path. - Add the HTTPS URI to your Logto application's Redirect URIs.
- Pass the same URI to
signInWithBrowser.
On iOS 17.4 and newer, the SDK uses ASWebAuthenticationSession's HTTPS callback matching API so HTTPS redirects can automatically complete and dismiss the session. On older iOS versions, the authorization request can still use the HTTPS redirect URI, but the session may not close automatically unless your app handles the Universal Link callback itself. Keep a custom scheme redirect as a compatibility option if you need automatic completion on older iOS versions.
ไปที่หน้ารายละเอียดแอปพลิเคชันของ Logto Console เพิ่ม Redirect URI io.logto://callback แล้วคลิก "บันทึกการเปลี่ยนแปลง" (Save changes)
The Redirect URI in iOS SDK is only for internal use. There's NO NEED to add a Custom URL Scheme until a connector asks.
Sign-in and sign-out
ก่อนเรียก .signInWithBrowser(redirectUri:) โปรดตรวจสอบให้แน่ใจว่าคุณได้กำหนดค่า Redirect URI ใน Admin Console อย่างถูกต้องแล้ว
- v2 (beta)
- v1
In v2, client.signOut(postLogoutRedirectUri:) performs a complete sign-out: it clears the local credentials, revokes the refresh token, and ends the Logto session by opening the end session endpoint in the system browser. The browser then navigates back to your app through the post sign-out redirect URI. Before using it, switch to the application details page of Logto Console, add the post sign-out redirect URI io.logto.app://signed-out and click "Save changes". The post sign-out redirect URI can use the same custom scheme you registered for sign-in.
For example, in a SwiftUI app:
struct ContentView: View {
  @State var isAuthenticated: Bool

  private let redirectUri = "io.logto.app://callback"
  private let postLogoutRedirectUri = "io.logto.app://signed-out"

  init() {
    isAuthenticated = client.isAuthenticated
  }

  var body: some View {
    VStack {
      if isAuthenticated {
        Button("Sign Out") {
          Task { [self] in
            let error = await client.signOut(postLogoutRedirectUri: postLogoutRedirectUri)
            if let error = error {
              print(error)
              return
            }
            isAuthenticated = false
          }
        }
      } else {
        Button("Sign In") {
          Task { [self] in
            do {
              try await client.signInWithBrowser(redirectUri: redirectUri)
              isAuthenticated = true
            } catch let error as LogtoClientErrors.SignIn {
              // error occurred during sign in
            } catch {
              // other errors
            }
          }
        }
      }
    }
  }
}
- You can also call
client.signOut()without a post sign-out redirect URI. No Console configuration is needed in this case: the browser shows the Logto sign-out page, and the user returns to the app by dismissing it manually. - If no UI context is available, you can call
client.clearCredentials()to clear the local credentials and revoke the refresh token. Note that this keeps the Logto session in the browser, so the nextsignInWithBrowsermay silently sign the user back in through that session.
You can use client.signInWithBrowser(redirectUri:) to sign in the user and client.signOut() to sign out the user.
For example, in a SwiftUI app:
struct ContentView: View {
  @State var isAuthenticated: Bool

  init() {
    isAuthenticated = client.isAuthenticated
  }

  var body: some View {
    VStack {
      if isAuthenticated {
        Button("Sign Out") {
          Task { [self] in
            await client.signOut()
            isAuthenticated = false
          }
        }
      } else {
        Button("Sign In") {
          Task { [self] in
            do {
              try await client.signInWithBrowser(redirectUri: "io.logto://callback")
              isAuthenticated = true
            } catch let error as LogtoClientErrors.SignIn {
              // error occurred during sign in
            } catch {
              // other errors
            }
          }
        }
      }
    }
  }
}
จุดตรวจสอบ: ทดสอบแอปพลิเคชันของคุณ
ตอนนี้คุณสามารถทดสอบแอปพลิเคชันของคุณได้แล้ว:
- รันแอปพลิเคชันของคุณ คุณจะเห็นปุ่มลงชื่อเข้าใช้
- คลิกปุ่มลงชื่อเข้าใช้ SDK จะเริ่มกระบวนการลงชื่อเข้าใช้และเปลี่ยนเส้นทางคุณไปยังหน้าลงชื่อเข้าใช้ของ Logto
- หลังจากที่คุณลงชื่อเข้าใช้แล้ว คุณจะถูกเปลี่ยนเส้นทางกลับไปยังแอปพลิเคชันของคุณและเห็นปุ่มลงชื่อออก
- คลิกปุ่มลงชื่อออกเพื่อเคลียร์ที่เก็บโทเค็นและออกจากระบบ
เพิ่มตัวเชื่อมต่อ Line
เพื่อเปิดใช้งานการลงชื่อเข้าใช้อย่างรวดเร็วและเพิ่มอัตราการเปลี่ยนผู้ใช้ ให้เชื่อมต่อกับ iOS (Swift) ในฐานะผู้ให้บริการข้อมูลระบุตัวตน (Identity provider) ตัวเชื่อมต่อโซเชียลของ Logto ช่วยให้คุณสร้างการเชื่อมต่อนี้ได้ภายในไม่กี่นาที โดยสามารถกรอกพารามิเตอร์ได้หลายค่า
ในการเพิ่มตัวเชื่อมต่อโซเชียล ให้ทำตามขั้นตอนดังนี้:
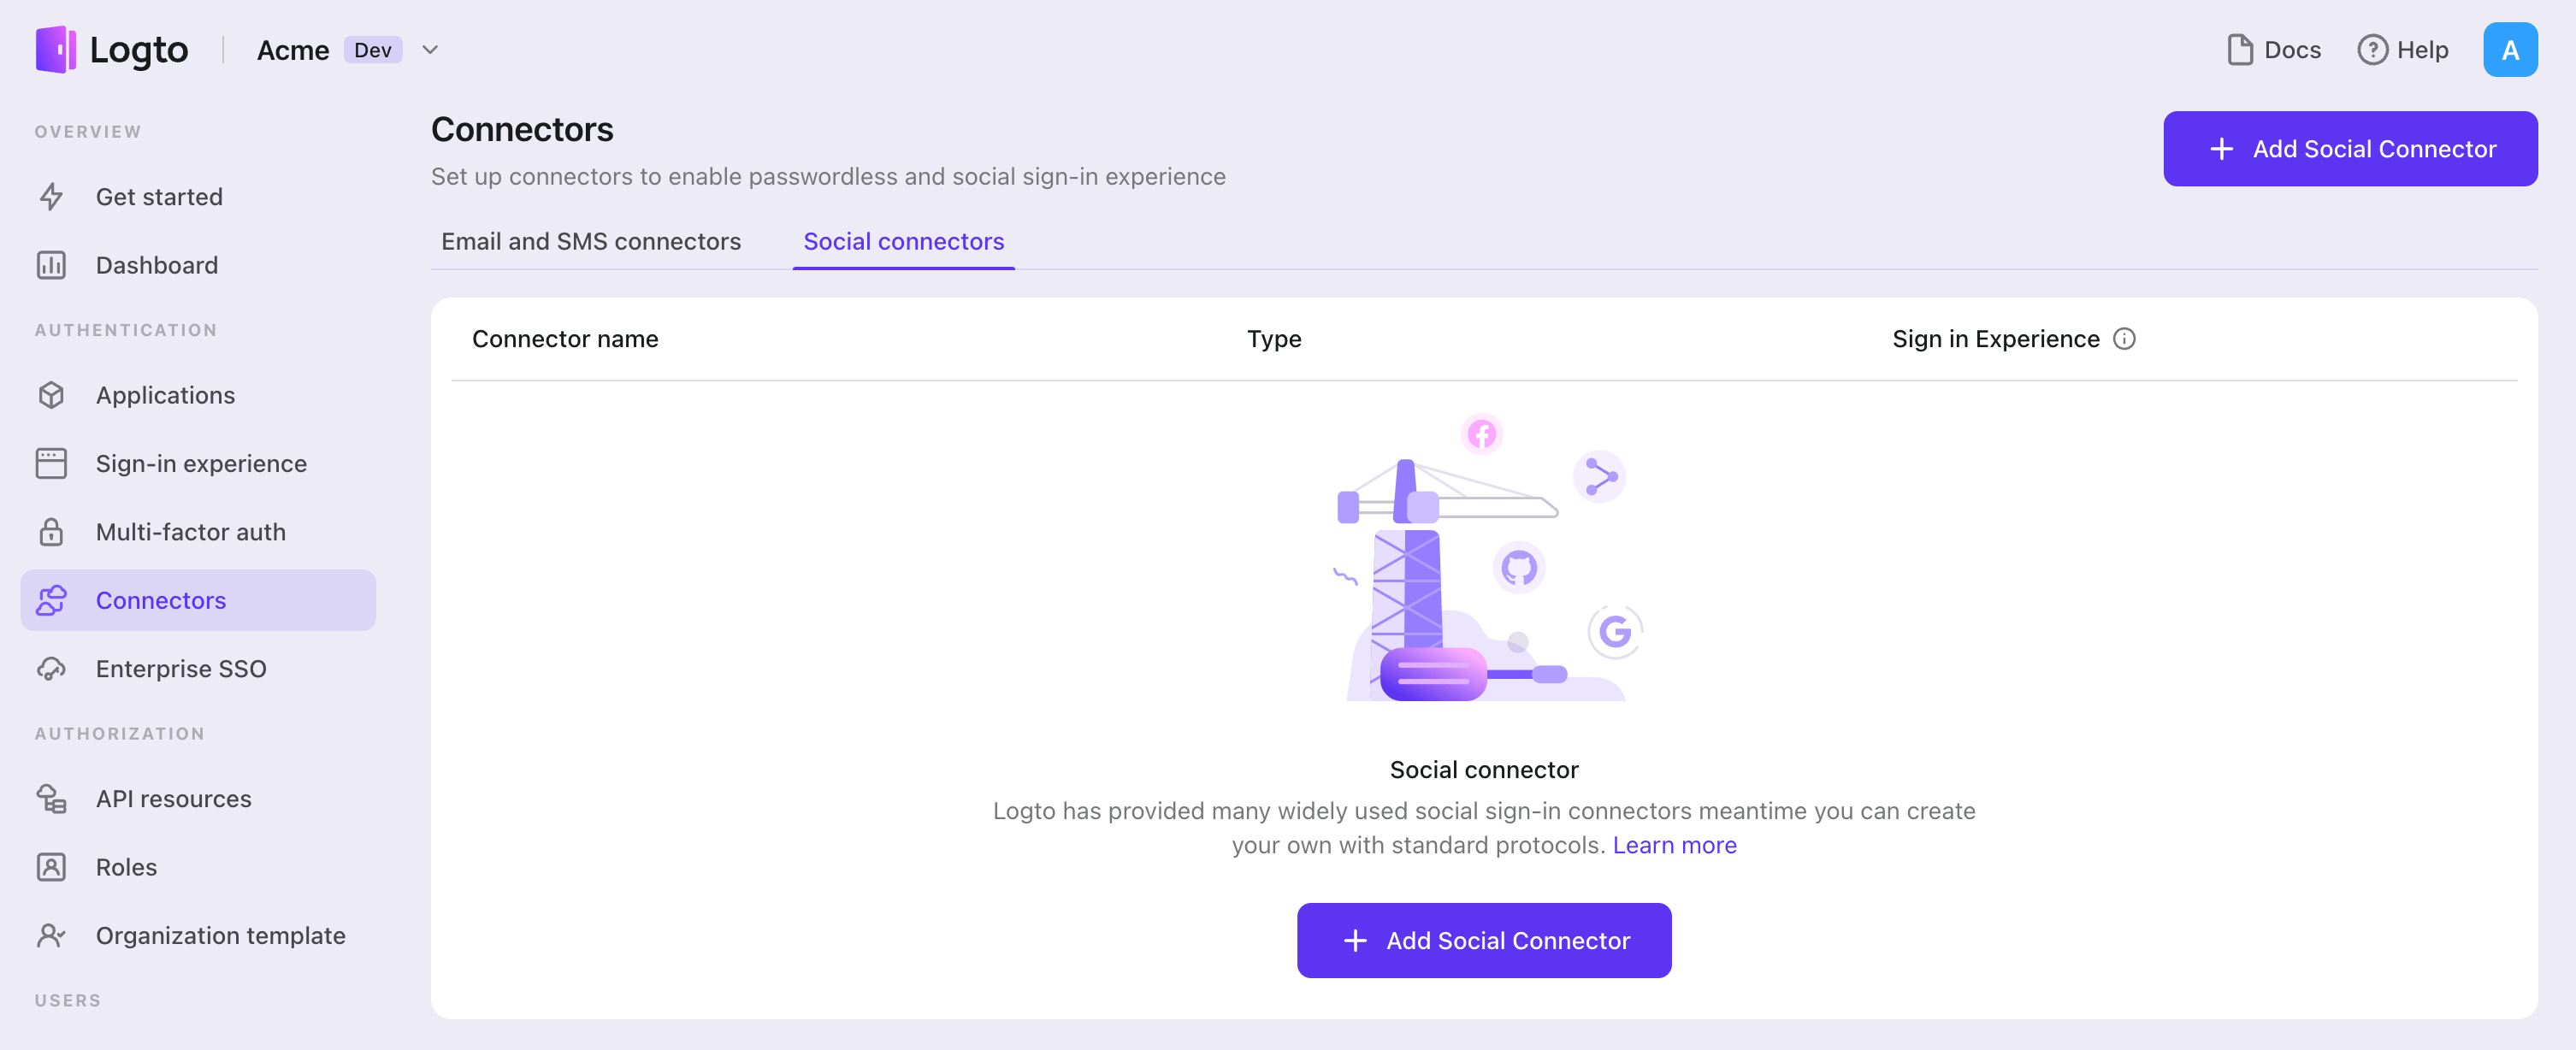
- ไปที่ Console > Connectors > Social Connectors
- คลิก "Add social connector" และเลือก "Line"
- ทำตามคู่มือ README กรอกข้อมูลที่จำเป็น และปรับแต่งการตั้งค่า
หากคุณกำลังทำตามคู่มือ Connector แบบ in-place คุณสามารถข้ามส่วนถัดไปได้
ตั้งค่า Line OAuth app
ตั้งค่าช่องทาง Line
ไปที่ Line Developers และลงชื่อเข้าใช้ด้วยบัญชีธุรกิจ Line ของคุณ หากยังไม่มีบัญชี คุณสามารถลงทะเบียนได้
จากนั้นไปที่ ลิงก์นี้ เพื่อสร้างช่องทาง (channel)
ขั้นตอนที่ 1: กรอกรายละเอียดช่องทาง
กรอกแบบฟอร์มให้ครบถ้วนและสร้างช่องทาง
ขั้นตอนที่ 2: ตั้งค่า callback URLs
ไปที่หน้ารายละเอียดช่องทาง ค้นหาแท็บ "LINE login" และแก้ไขช่อง "Callback URL"
ในกรณีของเรา จะเป็น ${your_logto_endpoint}/callback/${connector_id} เช่น https://foo.logto.app/callback/${connector_id} โดยสามารถดู connector_id ได้ที่แถบด้านบนของหน้ารายละเอียดตัวเชื่อมต่อใน Logto Admin Console
กำหนดค่าตัวเชื่อมต่อของคุณ
ในหน้ากำหนดค่าตัวเชื่อมต่อ Logto ของคุณ ให้กรอกข้อมูลในช่องต่อไปนี้ด้วยค่าที่ได้จากแท็บ "Auth" ส่วน "Application credentials" ของแอปของคุณ:
- clientId: Channel ID ของแอปของคุณ
- clientSecret: Channel Secret ของแอปของคุณ
scope คือรายการ OIDC scopes ที่คั่นด้วยช่องว่าง หากไม่ได้ระบุ จะใช้ค่าเริ่มต้นเป็น openid profile
ประเภทของ config
| Name | Type |
|---|---|
| clientId | string |
| clientSecret | string |
| scope | string |
บันทึกการตั้งค่าของคุณ
โปรดตรวจสอบให้แน่ใจว่าคุณได้กรอกค่าที่จำเป็นในพื้นที่การตั้งค่าตัวเชื่อมต่อ Logto เรียบร้อยแล้ว คลิก "บันทึกและเสร็จสิ้น" (หรือ "บันทึกการเปลี่ยนแปลง") และตัวเชื่อมต่อ Line ควรพร้อมใช้งานแล้ว
เปิดใช้งานตัวเชื่อมต่อ Line ในประสบการณ์การลงชื่อเข้าใช้
เมื่อคุณสร้างตัวเชื่อมต่อโซเชียลสำเร็จแล้ว คุณสามารถเปิดใช้งานเป็นปุ่ม "ดำเนินการต่อด้วย Line" ในประสบการณ์การลงชื่อเข้าใช้ (Sign-in Experience) ได้
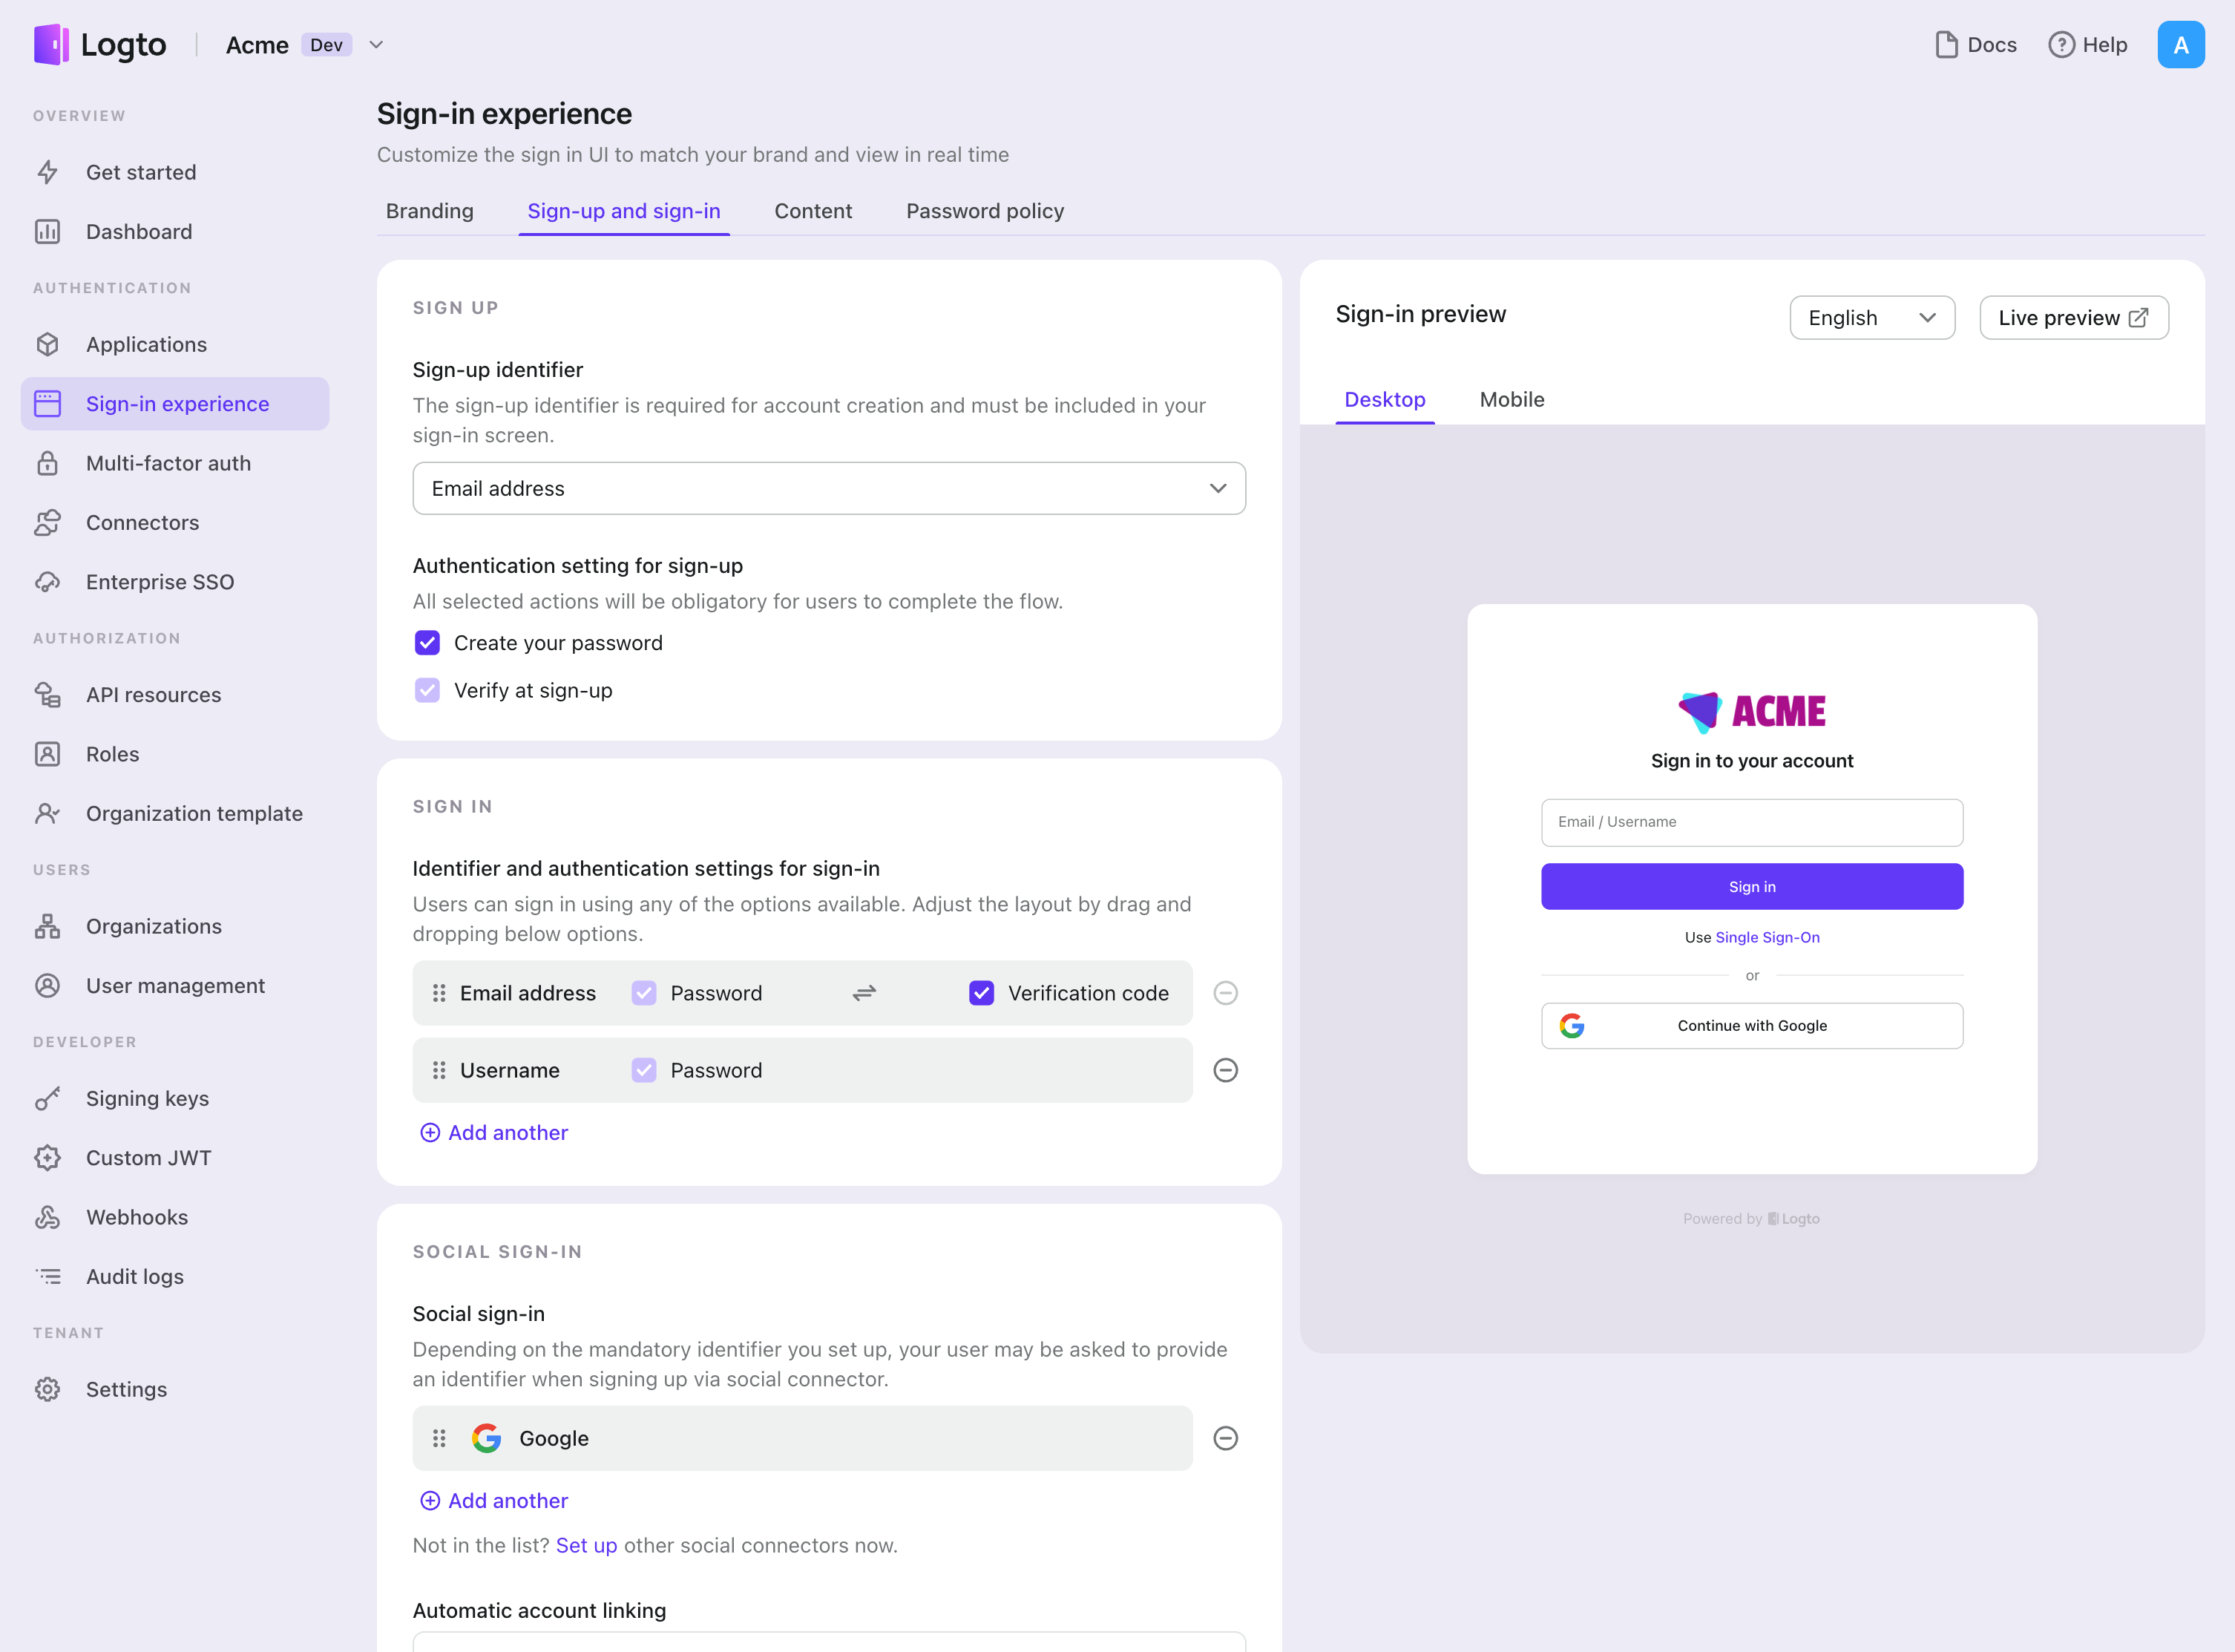
- ไปที่ Console > ประสบการณ์การลงชื่อเข้าใช้ > สมัครและลงชื่อเข้าใช้
- (ไม่บังคับ) เลือก "ไม่เกี่ยวข้อง" สำหรับตัวระบุการสมัคร หากคุณต้องการเฉพาะการเข้าสู่ระบบโซเชียล
- เพิ่มตัวเชื่อมต่อ Line ที่ตั้งค่าไว้แล้วในส่วน "เข้าสู่ระบบโซเชียล" (Social sign-in)
การทดสอบและการตรวจสอบความถูกต้อง
กลับไปที่แอป iOS (Swift) ของคุณ ตอนนี้คุณควรจะสามารถลงชื่อเข้าใช้ด้วย Line ได้แล้ว ขอให้สนุก!
อ่านเพิ่มเติม
กระบวนการสำหรับผู้ใช้ปลายทาง: Logto มีโฟลว์การยืนยันตัวตนสำเร็จรูปพร้อมใช้งาน รวมถึง MFA และ Enterprise SSO พร้อม API อันทรงพลังสำหรับการปรับแต่งการตั้งค่าบัญชี การตรวจสอบความปลอดภัย และประสบการณ์แบบหลายผู้เช่า (multi-tenant) ได้อย่างยืดหยุ่น
การอนุญาต (Authorization): การอนุญาต (Authorization) กำหนดว่าผู้ใช้สามารถทำอะไรหรือเข้าถึงทรัพยากรใดได้บ้างหลังจากได้รับการยืนยันตัวตนแล้ว สำรวจวิธีปกป้อง API ของคุณสำหรับแอปเนทีฟและแอปหน้าเดียว (SPA) และการใช้งานการควบคุมการเข้าถึงตามบทบาท (RBAC)
องค์กร (Organizations): ฟีเจอร์องค์กรมีประสิทธิภาพอย่างยิ่งใน SaaS แบบหลายผู้เช่าและแอป B2B โดยช่วยให้สร้างผู้เช่า จัดการสมาชิก RBAC ระดับองค์กร และ Just-in-Time Provisioning ได้
ชุดบทความ Customer IAM: บทความต่อเนื่องเกี่ยวกับการจัดการข้อมูลระบุตัวตนและการเข้าถึงของลูกค้า (Customer IAM) ตั้งแต่ระดับพื้นฐาน 101 ไปจนถึงหัวข้อขั้นสูงและอื่น ๆ