Logto is an Auth0 alternative designed for modern apps and SaaS products. It offers both Cloud and Open-source services to help you quickly launch your identity and management (IAM) system. Enjoy authentication, authorization, and multi-tenant management all in one.
We recommend starting with a free development tenant on Logto Cloud. This allows you to explore all the features easily.
In this article, we will go through the steps to quickly build the Microsoft Entra ID OIDC enterprise SSO sign-in experience (user authentication) with iOS (Swift) and Logto.
Prerequisites
- A running Logto instance. Check out the introduction page to get started.
- Basic knowledge of iOS (Swift).
- A usable Microsoft Entra ID OIDC enterprise SSO account.
Create an application in Logto
Logto is based on OpenID Connect (OIDC) authentication and OAuth 2.0 authorization. It supports federated identity management across multiple applications, commonly called Single Sign-On (SSO).
To create your Native app application, simply follow these steps:
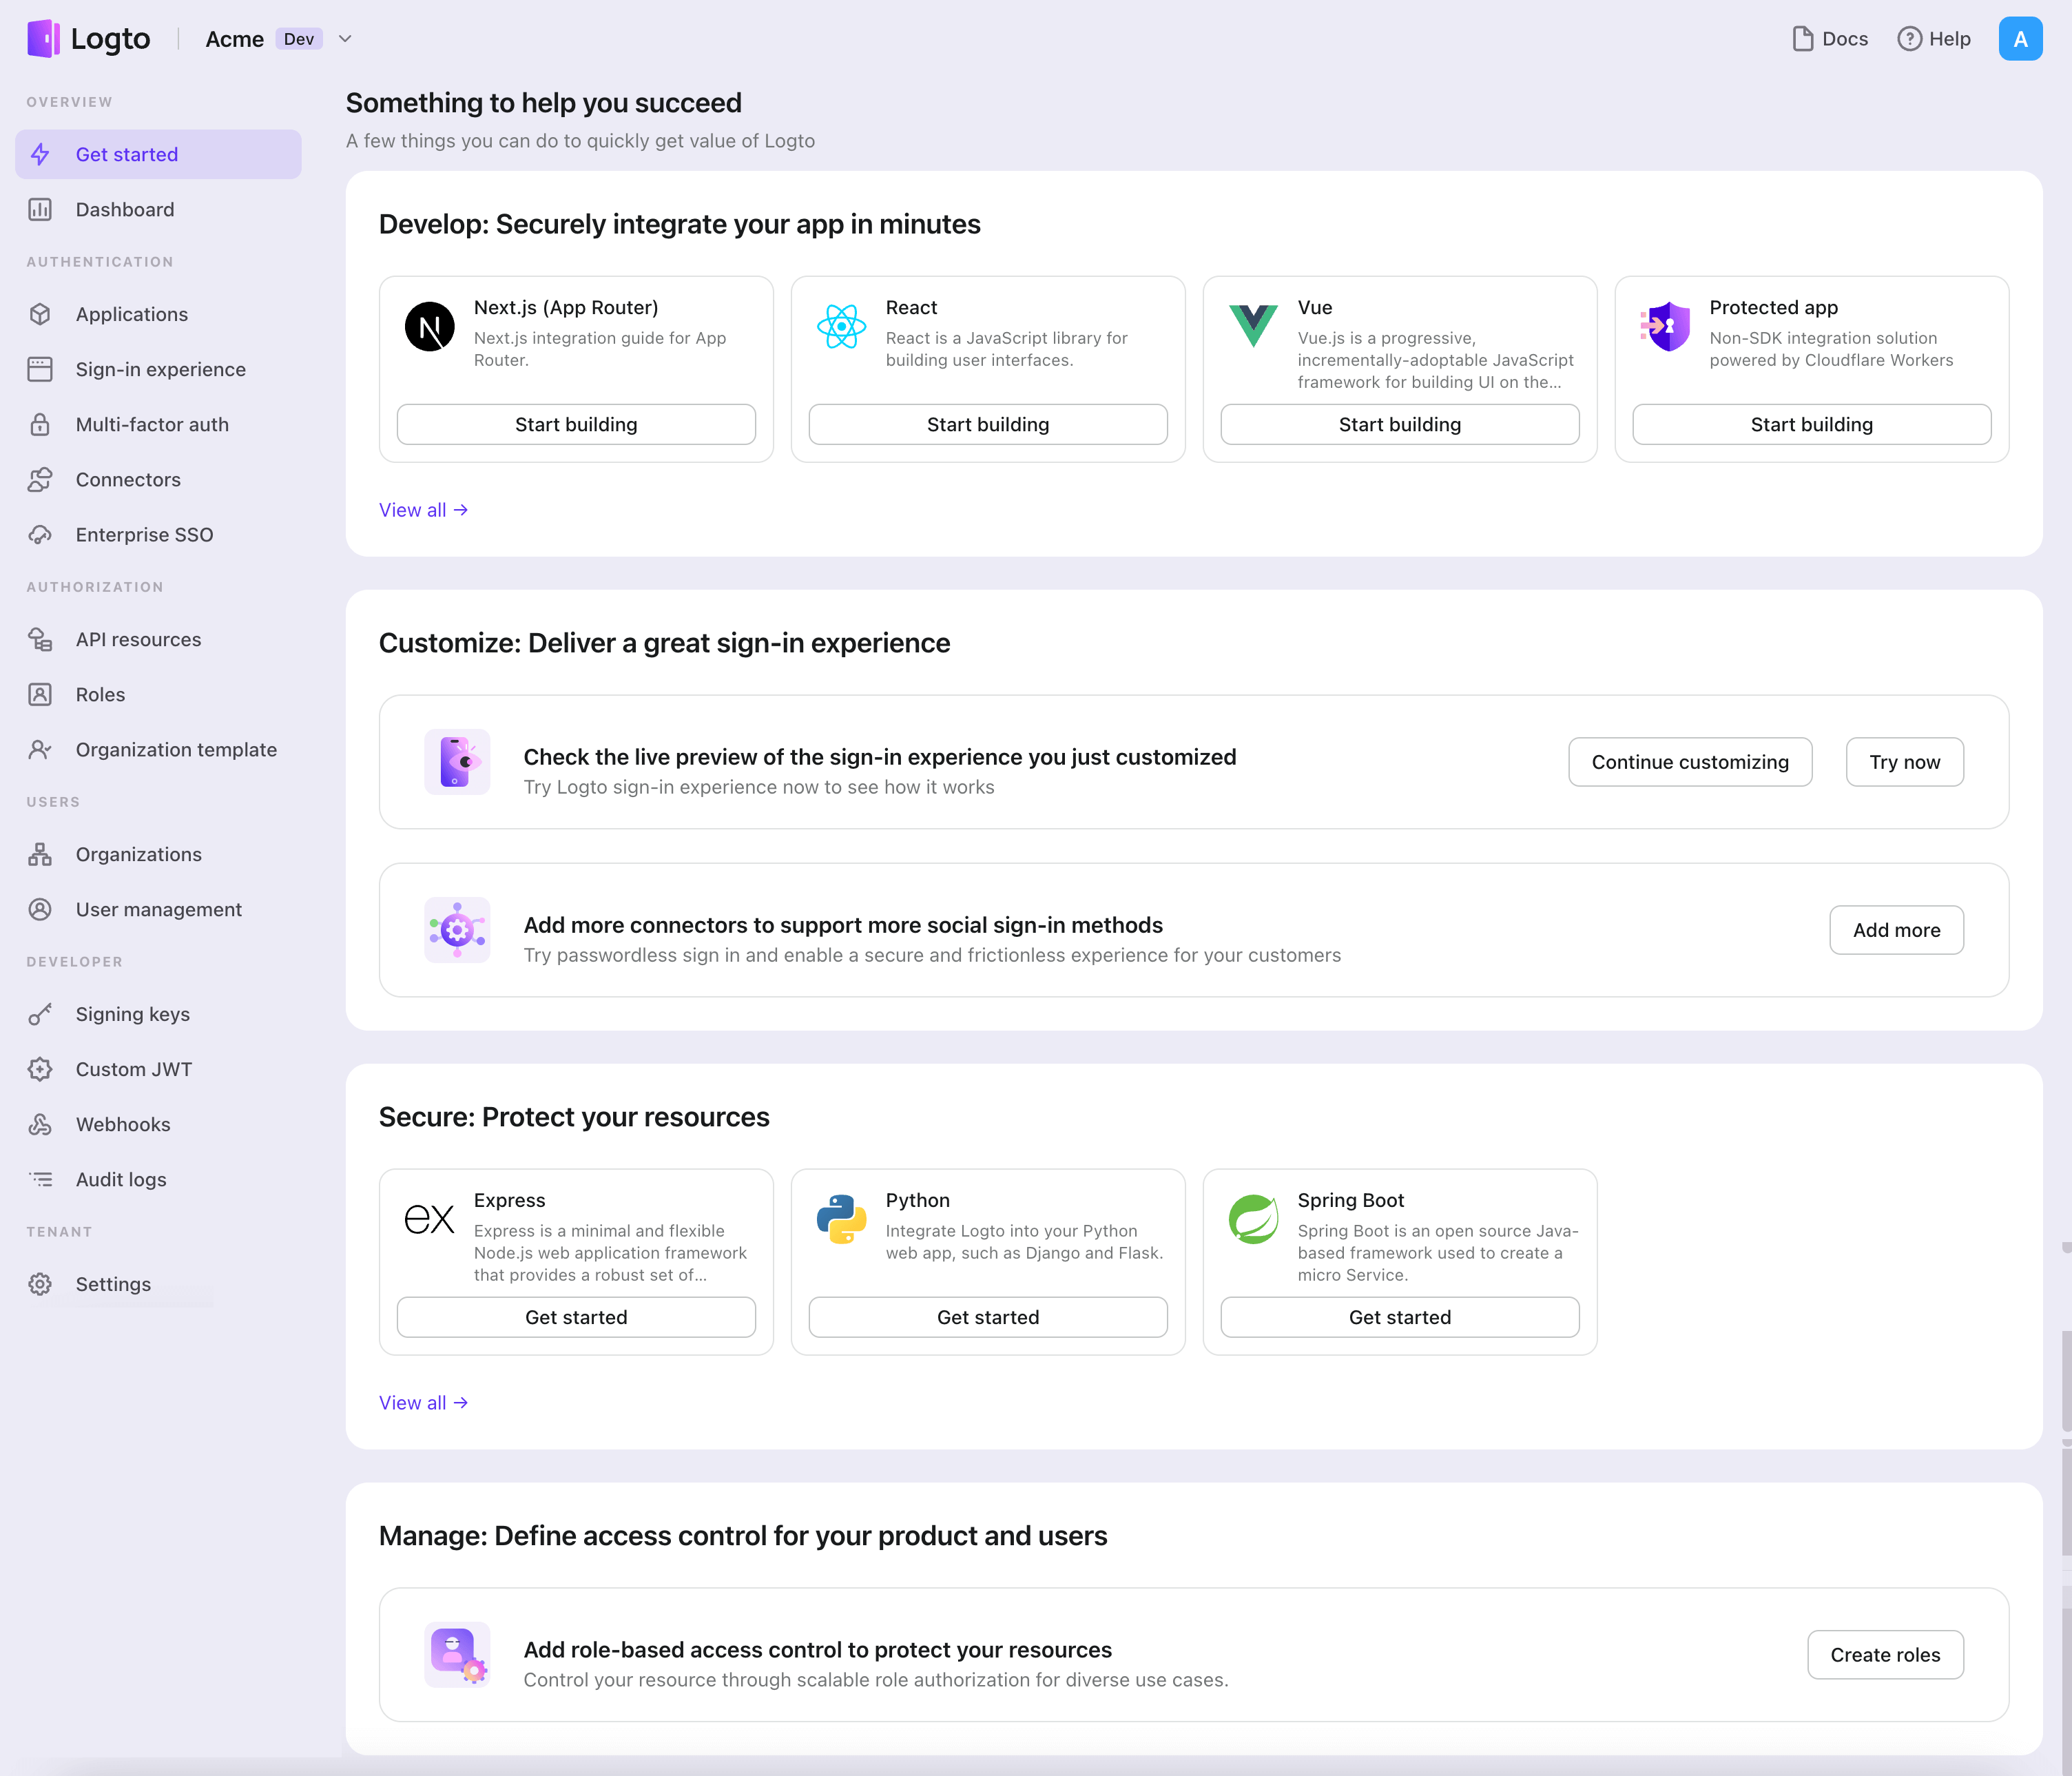
- Open the Logto Console. In the "Get started" section, click the "View all" link to open the application frameworks list. Alternatively, you can navigate to Logto Console > Applications, and click the "Create application" button.
- In the opening modal, click the "Native app" section or filter all the available "Native app" frameworks using the quick filter checkboxes on the left. Click the "iOS (Swift)" framework card to start creating your application.

- Enter the application name, e.g., "Bookstore," and click "Create application".
🎉 Ta-da! You just created your first application in Logto. You'll see a congrats page which includes a detailed integration guide. Follow the guide to see what the experience will be in your application.
Integrate iOS (Swift) with Logto
Add Logto SDK as a dependency
The minimum supported iOS version of Logto Swift SDK is iOS 13.
Logto Swift SDK comes in two major versions:
- v1: Opens the sign-in experience in an embedded WebView, which is required by the native social plugin targets, but does not support passkey sign-in (WebView does not support WebAuthn, the underlying standard of passkeys).
- v2 (beta): Opens the sign-in experience in
ASWebAuthenticationSession(the system browser), which unlocks passkey sign-in and shares the browser session. Note that v2 removes the native social plugin targets; social connectors still work through the browser. If you depend on the native WeChat or Alipay SDK handoff, stay on v1.
This guide covers both versions. Choose your version in the tabs below, and the choice will be kept in sync throughout this guide.
Use the following URL to add Logto SDK as a dependency in Swift Package Manager.
https://github.com/logto-io/swift.git
Since Xcode 11, you can directly import a Swift package w/o any additional tool.
When Xcode asks for the package version, choose the version you want to integrate:
- v2 (beta)
- v1
v2 is released as 2.0.0-beta.x prereleases until GA. Use 2.0.0-beta.1 or the latest 2.0.0-beta.x prerelease as the version. During beta, we recommend selecting the prerelease explicitly instead of relying on a normal version range to pick it automatically.
If you use Package.swift directly:
.package(url: "https://github.com/logto-io/swift.git", exact: "2.0.0-beta.1")
Use the latest v1 release as the stable line. The latest v1 version is 1.2.0.
If you use Package.swift directly:
.package(url: "https://github.com/logto-io/swift.git", from: "1.2.0")
We do not support Carthage and CocoaPods at the time due to some technical issues.
Carthage
Carthage needs a xcodeproj file to build. We will try to find a workaround later.
CocoaPods
CocoaPods does not support local dependency and monorepo, thus it's hard to create a .podspec for this repo.
Init LogtoClient
Initialize the client by creating a LogtoClient instance with a LogtoConfig object.
import Logto
import LogtoClient

let config = try? LogtoConfig(
  endpoint: "<your-logto-endpoint>", // E.g. http://localhost:3001
  appId: "<your-app-id>"
)
let client = LogtoClient(useConfig: config)
By default, we store credentials like ID Token and Refresh Token in the Keychain. Thus the user doesn't need to sign in again when he returns.
To turn off this behavior, set usingPersistStorage to false:
let config = try? LogtoConfig(
  // ...
  usingPersistStorage: false
)
Sign in
Before we dive into the details, here's a quick overview of the end-user experience. The sign-in process can be simplified as follows:
- Your app invokes the sign-in method.
- The user is redirected to the Logto sign-in page. For native apps, the system browser is opened.
- The user signs in and is redirected back to your app (configured as the redirect URI).
Regarding redirect-based sign-in
- This authentication process follows the OpenID Connect (OIDC) protocol, and Logto enforces strict security measures to protect user sign-in.
- If you have multiple apps, you can use the same identity provider (Logto). Once the user signs in to one app, Logto will automatically complete the sign-in process when the user accesses another app.
To learn more about the rationale and benefits of redirect-based sign-in, see Logto sign-in experience explained.
Configure redirect URI
- v2 (beta)
- v1
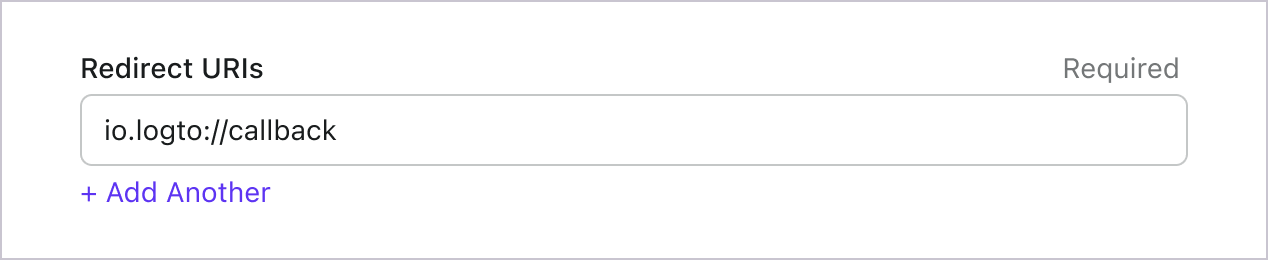
Let's switch to the Application details page of Logto Console. Add a Redirect URI io.logto.app://callback and click "Save changes".
In v2, the sign-in experience opens in ASWebAuthenticationSession (the system browser), and the redirect is routed back to your app through OS-level callback matching. For a custom scheme redirect URI such as io.logto.app://callback, register only the scheme part (io.logto.app) in your app's Info.plist, then add the full redirect URI to your Logto application's Redirect URIs.
In Xcode, open your app target, select Info, expand URL Types, and add one entry with io.logto.app in URL Schemes. If you edit Info.plist directly, add:
<key>CFBundleURLTypes</key>
<array>
  <dict>
    <key>CFBundleTypeRole</key>
    <string>Editor</string>
    <key>CFBundleURLName</key>
    <string>io.logto.app</string>
    <key>CFBundleURLSchemes</key>
    <array>
      <string>io.logto.app</string>
    </array>
  </dict>
</array>
For the browser flow in v2, you do not need to call LogtoClient.handle(url:); that plugin handoff API was removed with the embedded WebView flow.
Use Universal Links instead of a custom scheme?
You can also use an HTTPS redirect URI such as https://example.com/callback:
- Add the Associated Domains capability to your app.
- Configure
webcredentials:example.comsoASWebAuthenticationSessioncan match HTTPS callbacks on iOS 17.4 and newer. - If the same URL should also open your app as a Universal Link outside the authentication session, configure
applinks:example.comand host a validapple-app-site-associationfile for the domain and path. - Add the HTTPS URI to your Logto application's Redirect URIs.
- Pass the same URI to
signInWithBrowser.
On iOS 17.4 and newer, the SDK uses ASWebAuthenticationSession's HTTPS callback matching API so HTTPS redirects can automatically complete and dismiss the session. On older iOS versions, the authorization request can still use the HTTPS redirect URI, but the session may not close automatically unless your app handles the Universal Link callback itself. Keep a custom scheme redirect as a compatibility option if you need automatic completion on older iOS versions.
Let's switch to the Application details page of Logto Console. Add a Redirect URI io.logto://callback and click "Save changes".
The Redirect URI in iOS SDK is only for internal use. There's NO NEED to add a Custom URL Scheme until a connector asks.
Sign-in and sign-out
Before calling .signInWithBrowser(redirectUri:), make sure you have correctly configured Redirect URI
in Admin Console.
- v2 (beta)
- v1
In v2, client.signOut(postLogoutRedirectUri:) performs a complete sign-out: it clears the local credentials, revokes the refresh token, and ends the Logto session by opening the end session endpoint in the system browser. The browser then navigates back to your app through the post sign-out redirect URI. Before using it, switch to the application details page of Logto Console, add the post sign-out redirect URI io.logto.app://signed-out and click "Save changes". The post sign-out redirect URI can use the same custom scheme you registered for sign-in.
For example, in a SwiftUI app:
struct ContentView: View {
  @State var isAuthenticated: Bool

  private let redirectUri = "io.logto.app://callback"
  private let postLogoutRedirectUri = "io.logto.app://signed-out"

  init() {
    isAuthenticated = client.isAuthenticated
  }

  var body: some View {
    VStack {
      if isAuthenticated {
        Button("Sign Out") {
          Task { [self] in
            let error = await client.signOut(postLogoutRedirectUri: postLogoutRedirectUri)
            if let error = error {
              print(error)
              return
            }
            isAuthenticated = false
          }
        }
      } else {
        Button("Sign In") {
          Task { [self] in
            do {
              try await client.signInWithBrowser(redirectUri: redirectUri)
              isAuthenticated = true
            } catch let error as LogtoClientErrors.SignIn {
              // error occurred during sign in
            } catch {
              // other errors
            }
          }
        }
      }
    }
  }
}
- You can also call
client.signOut()without a post sign-out redirect URI. No Console configuration is needed in this case: the browser shows the Logto sign-out page, and the user returns to the app by dismissing it manually. - If no UI context is available, you can call
client.clearCredentials()to clear the local credentials and revoke the refresh token. Note that this keeps the Logto session in the browser, so the nextsignInWithBrowsermay silently sign the user back in through that session.
You can use client.signInWithBrowser(redirectUri:) to sign in the user and client.signOut() to sign out the user.
For example, in a SwiftUI app:
struct ContentView: View {
  @State var isAuthenticated: Bool

  init() {
    isAuthenticated = client.isAuthenticated
  }

  var body: some View {
    VStack {
      if isAuthenticated {
        Button("Sign Out") {
          Task { [self] in
            await client.signOut()
            isAuthenticated = false
          }
        }
      } else {
        Button("Sign In") {
          Task { [self] in
            do {
              try await client.signInWithBrowser(redirectUri: "io.logto://callback")
              isAuthenticated = true
            } catch let error as LogtoClientErrors.SignIn {
              // error occurred during sign in
            } catch {
              // other errors
            }
          }
        }
      }
    }
  }
}
Checkpoint: Test your application
Now, you can test your application:
- Run your application, you will see the sign-in button.
- Click the sign-in button, the SDK will init the sign-in process and redirect you to the Logto sign-in page.
- After you signed in, you will be redirected back to your application and see the sign-out button.
- Click the sign-out button to clear token storage and sign out.
Add Microsoft Entra ID OIDC enterprise SSO connector
To simplify access management and gain enterprise-level safeguards for your big clients, connect with iOS (Swift) as a federated identity provider. The Logto enterprise SSO connector helps you establish this connection in minutes by allowing several parameter inputs.
To add an enterprise SSO connector, simply follow these steps:
- Navigate to Logto console > Enterprise SSO.
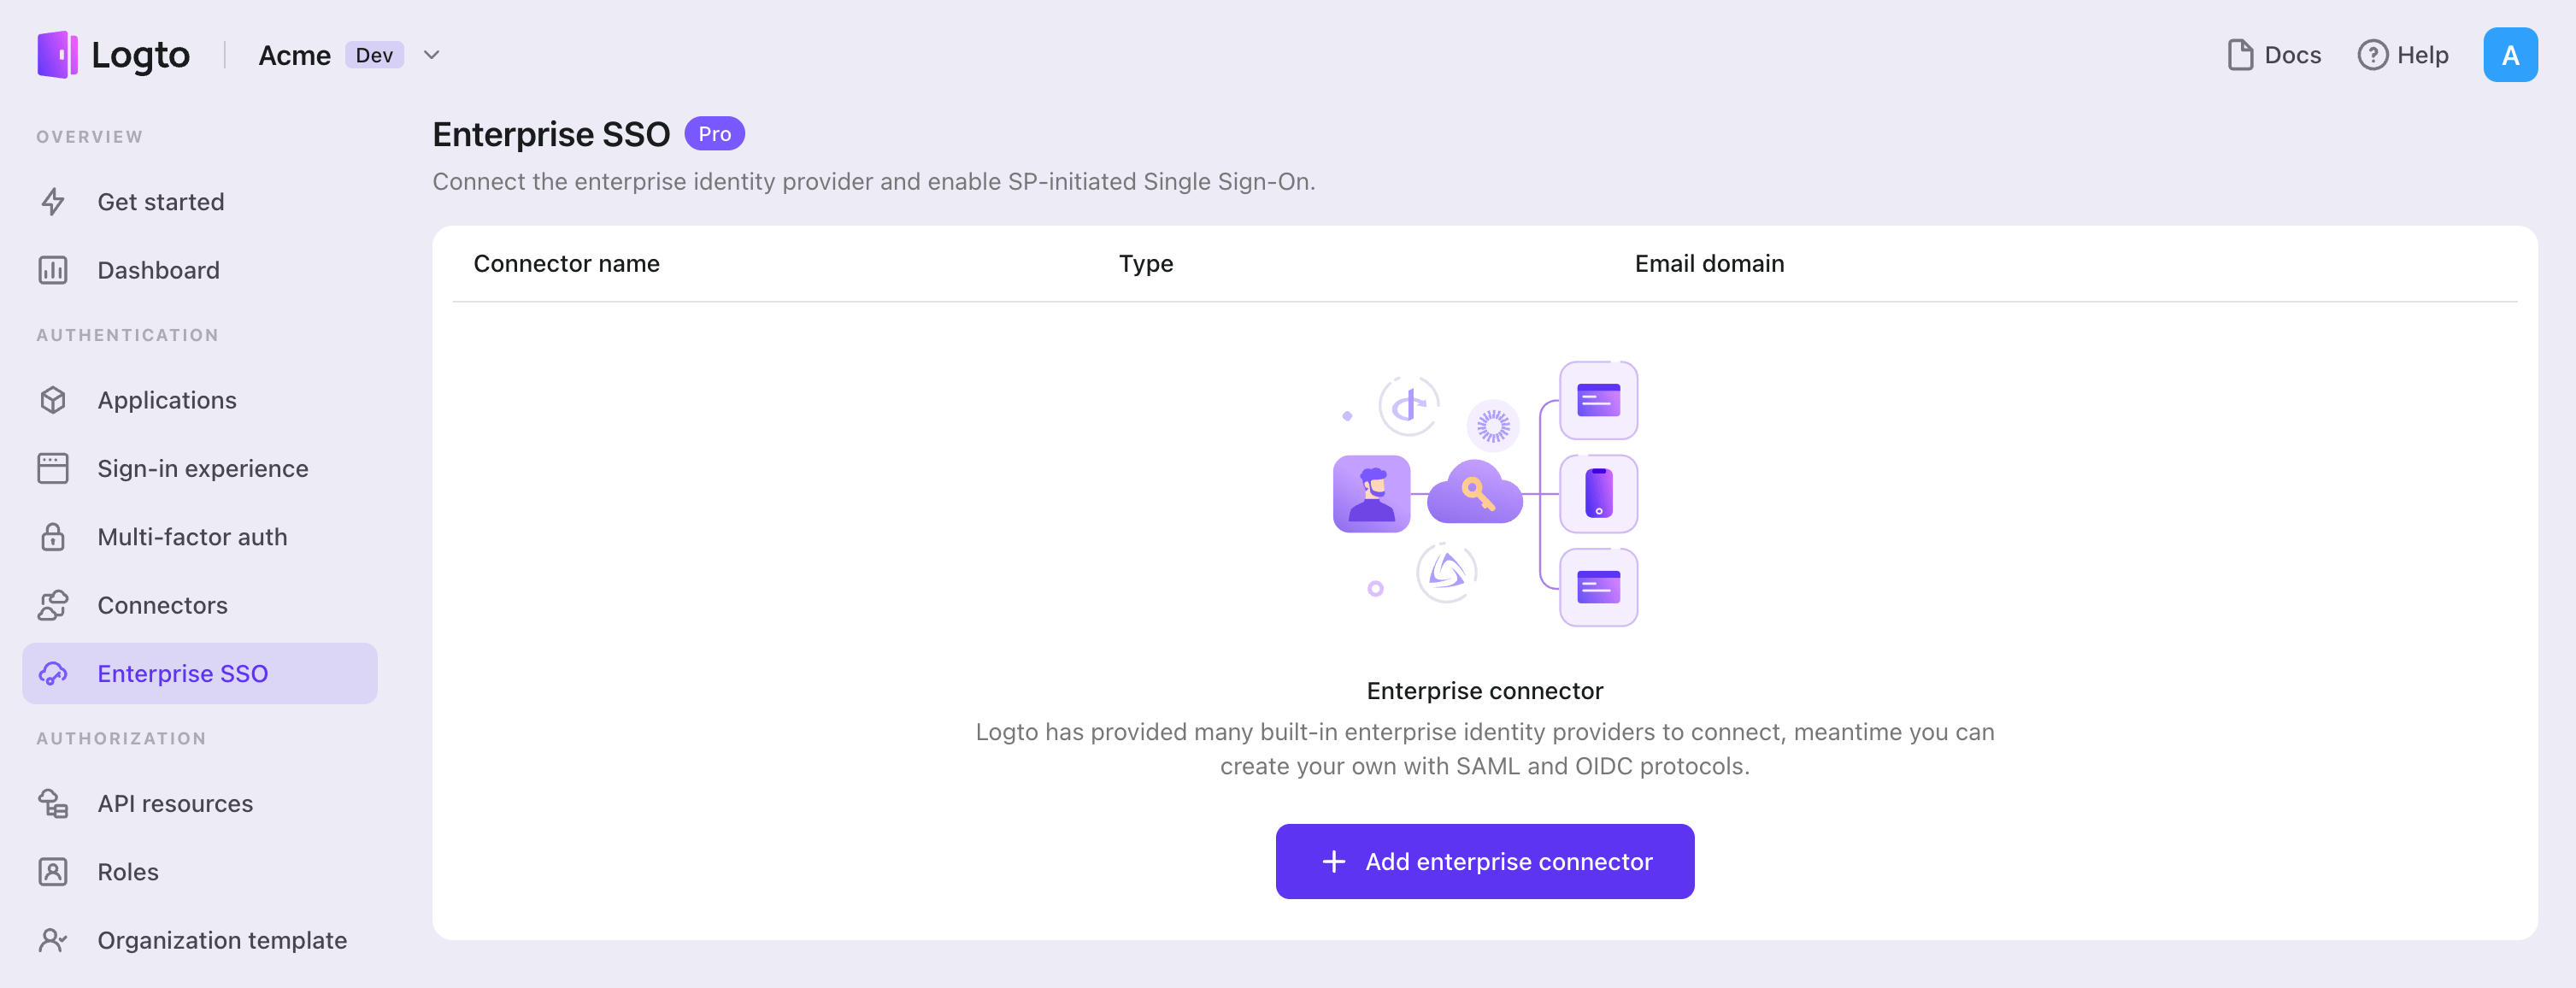
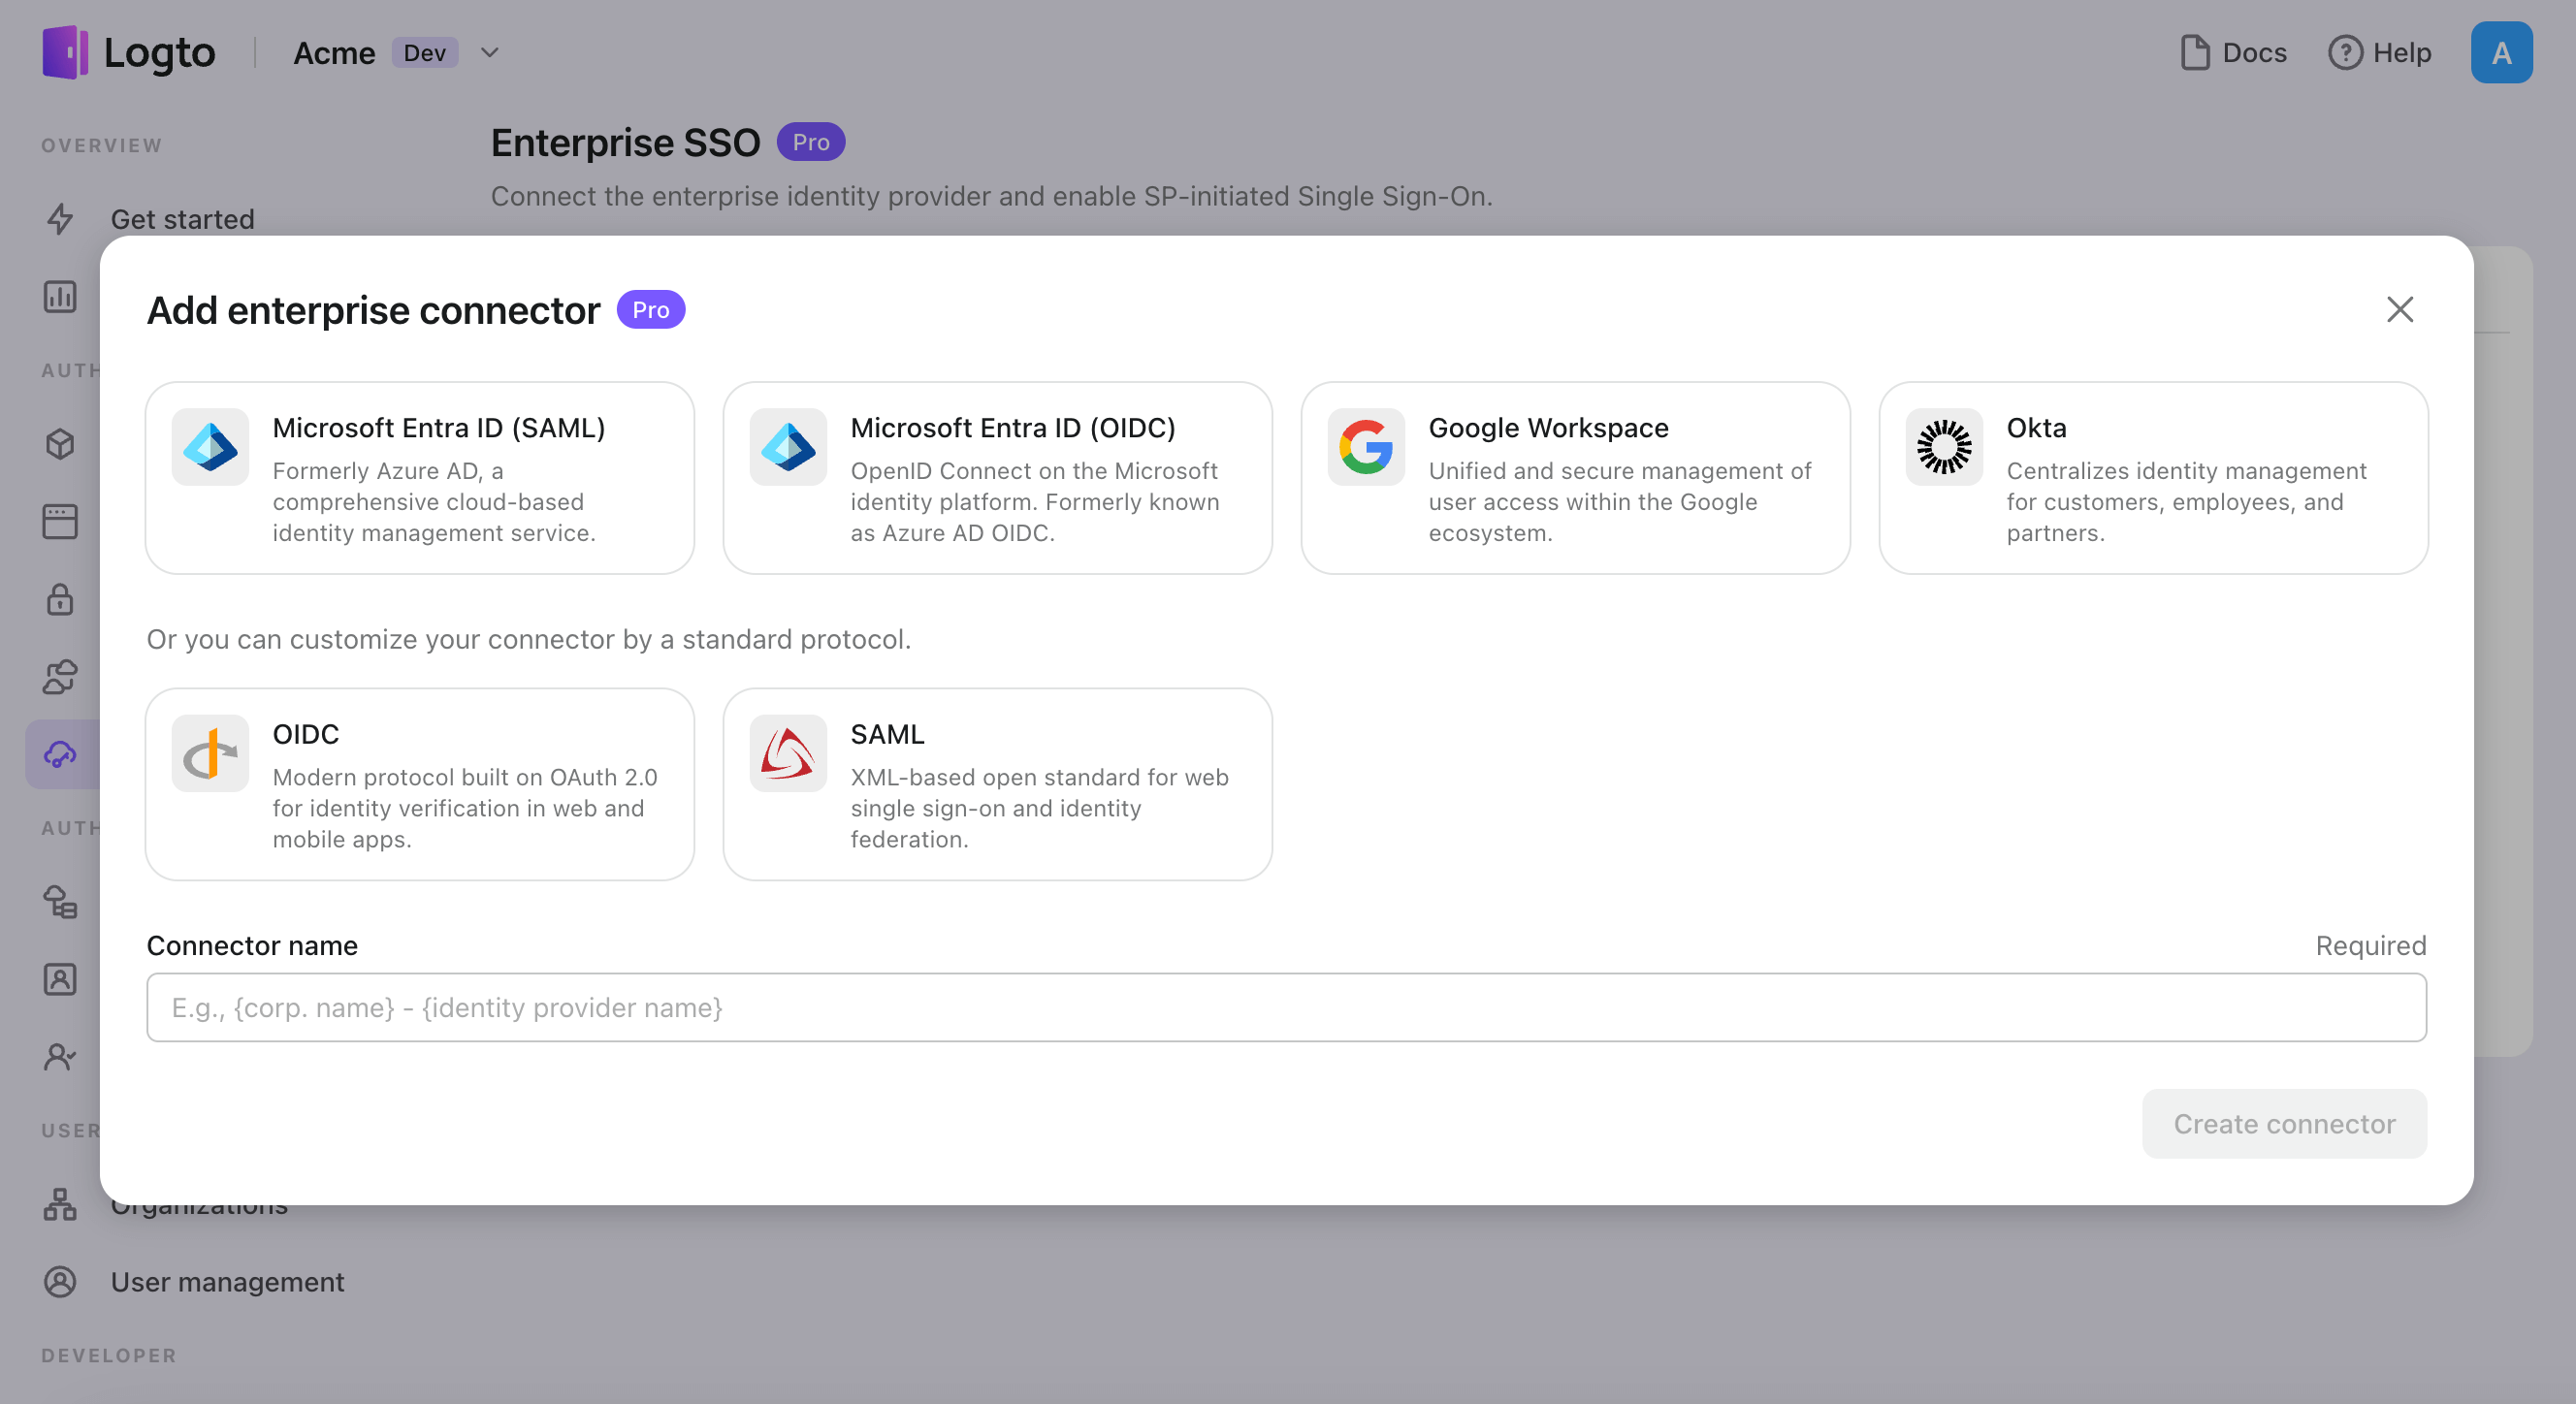
- Click "Add enterprise connector" button and choose your SSO provider type. Choose from prebuilt connectors for Microsoft Entra ID (Azure AD), Google Workspace, and Okta, or create a custom SSO connection using the standard OpenID Connect (OIDC) or SAML protocol.
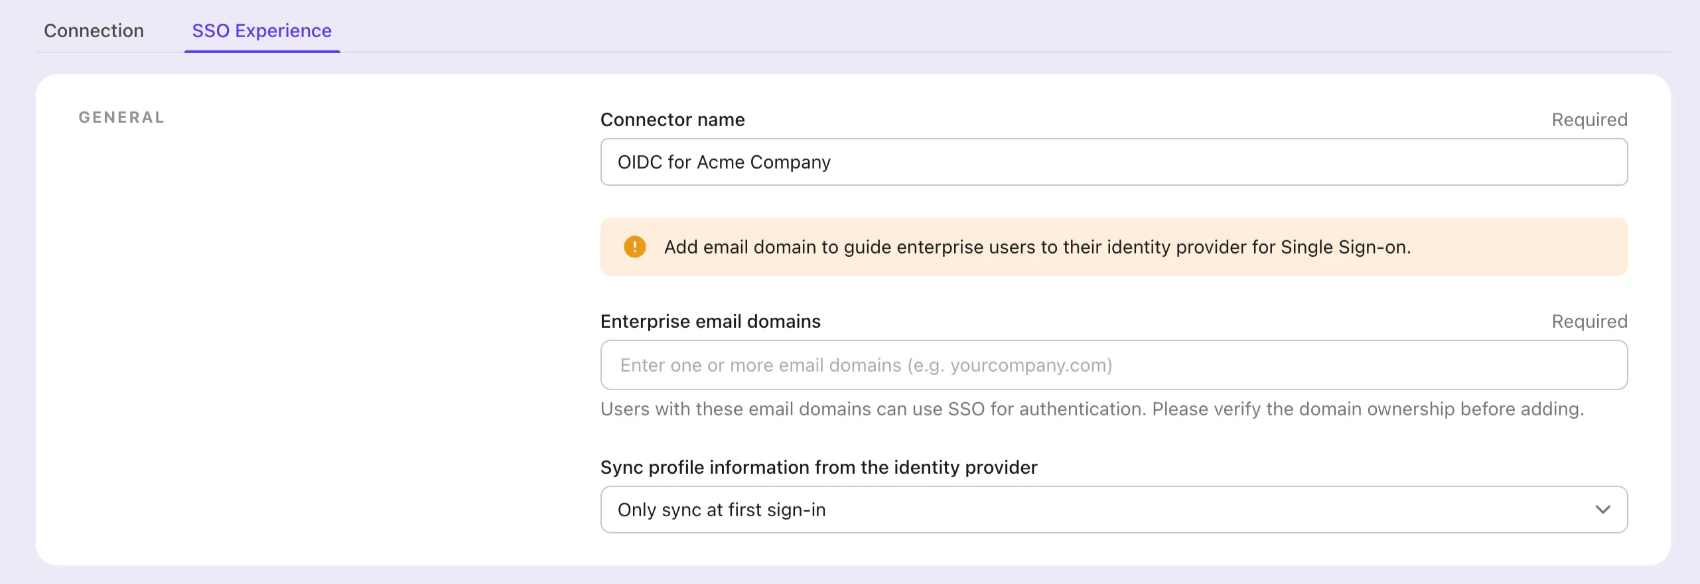
- Provide a unique name (e.g., SSO sign-in for Acme Company).
- Configure the connection with your IdP in the "Connection" tab. Check the guides above for each connector types.
- Customize the SSO experience and enterprise’s email domain in the "Experience" tab. Users sign in with the SSO-enabled email domain will be redirected to SSO authentication.
- Save changes.
Set up Azure AD SSO application
Step 1: Create an Microsoft EntraID OIDC application
-
Go to the Microsoft Entra admin center and sign in as an administrator.
-
Browse to Identity > Applications > App registrations.
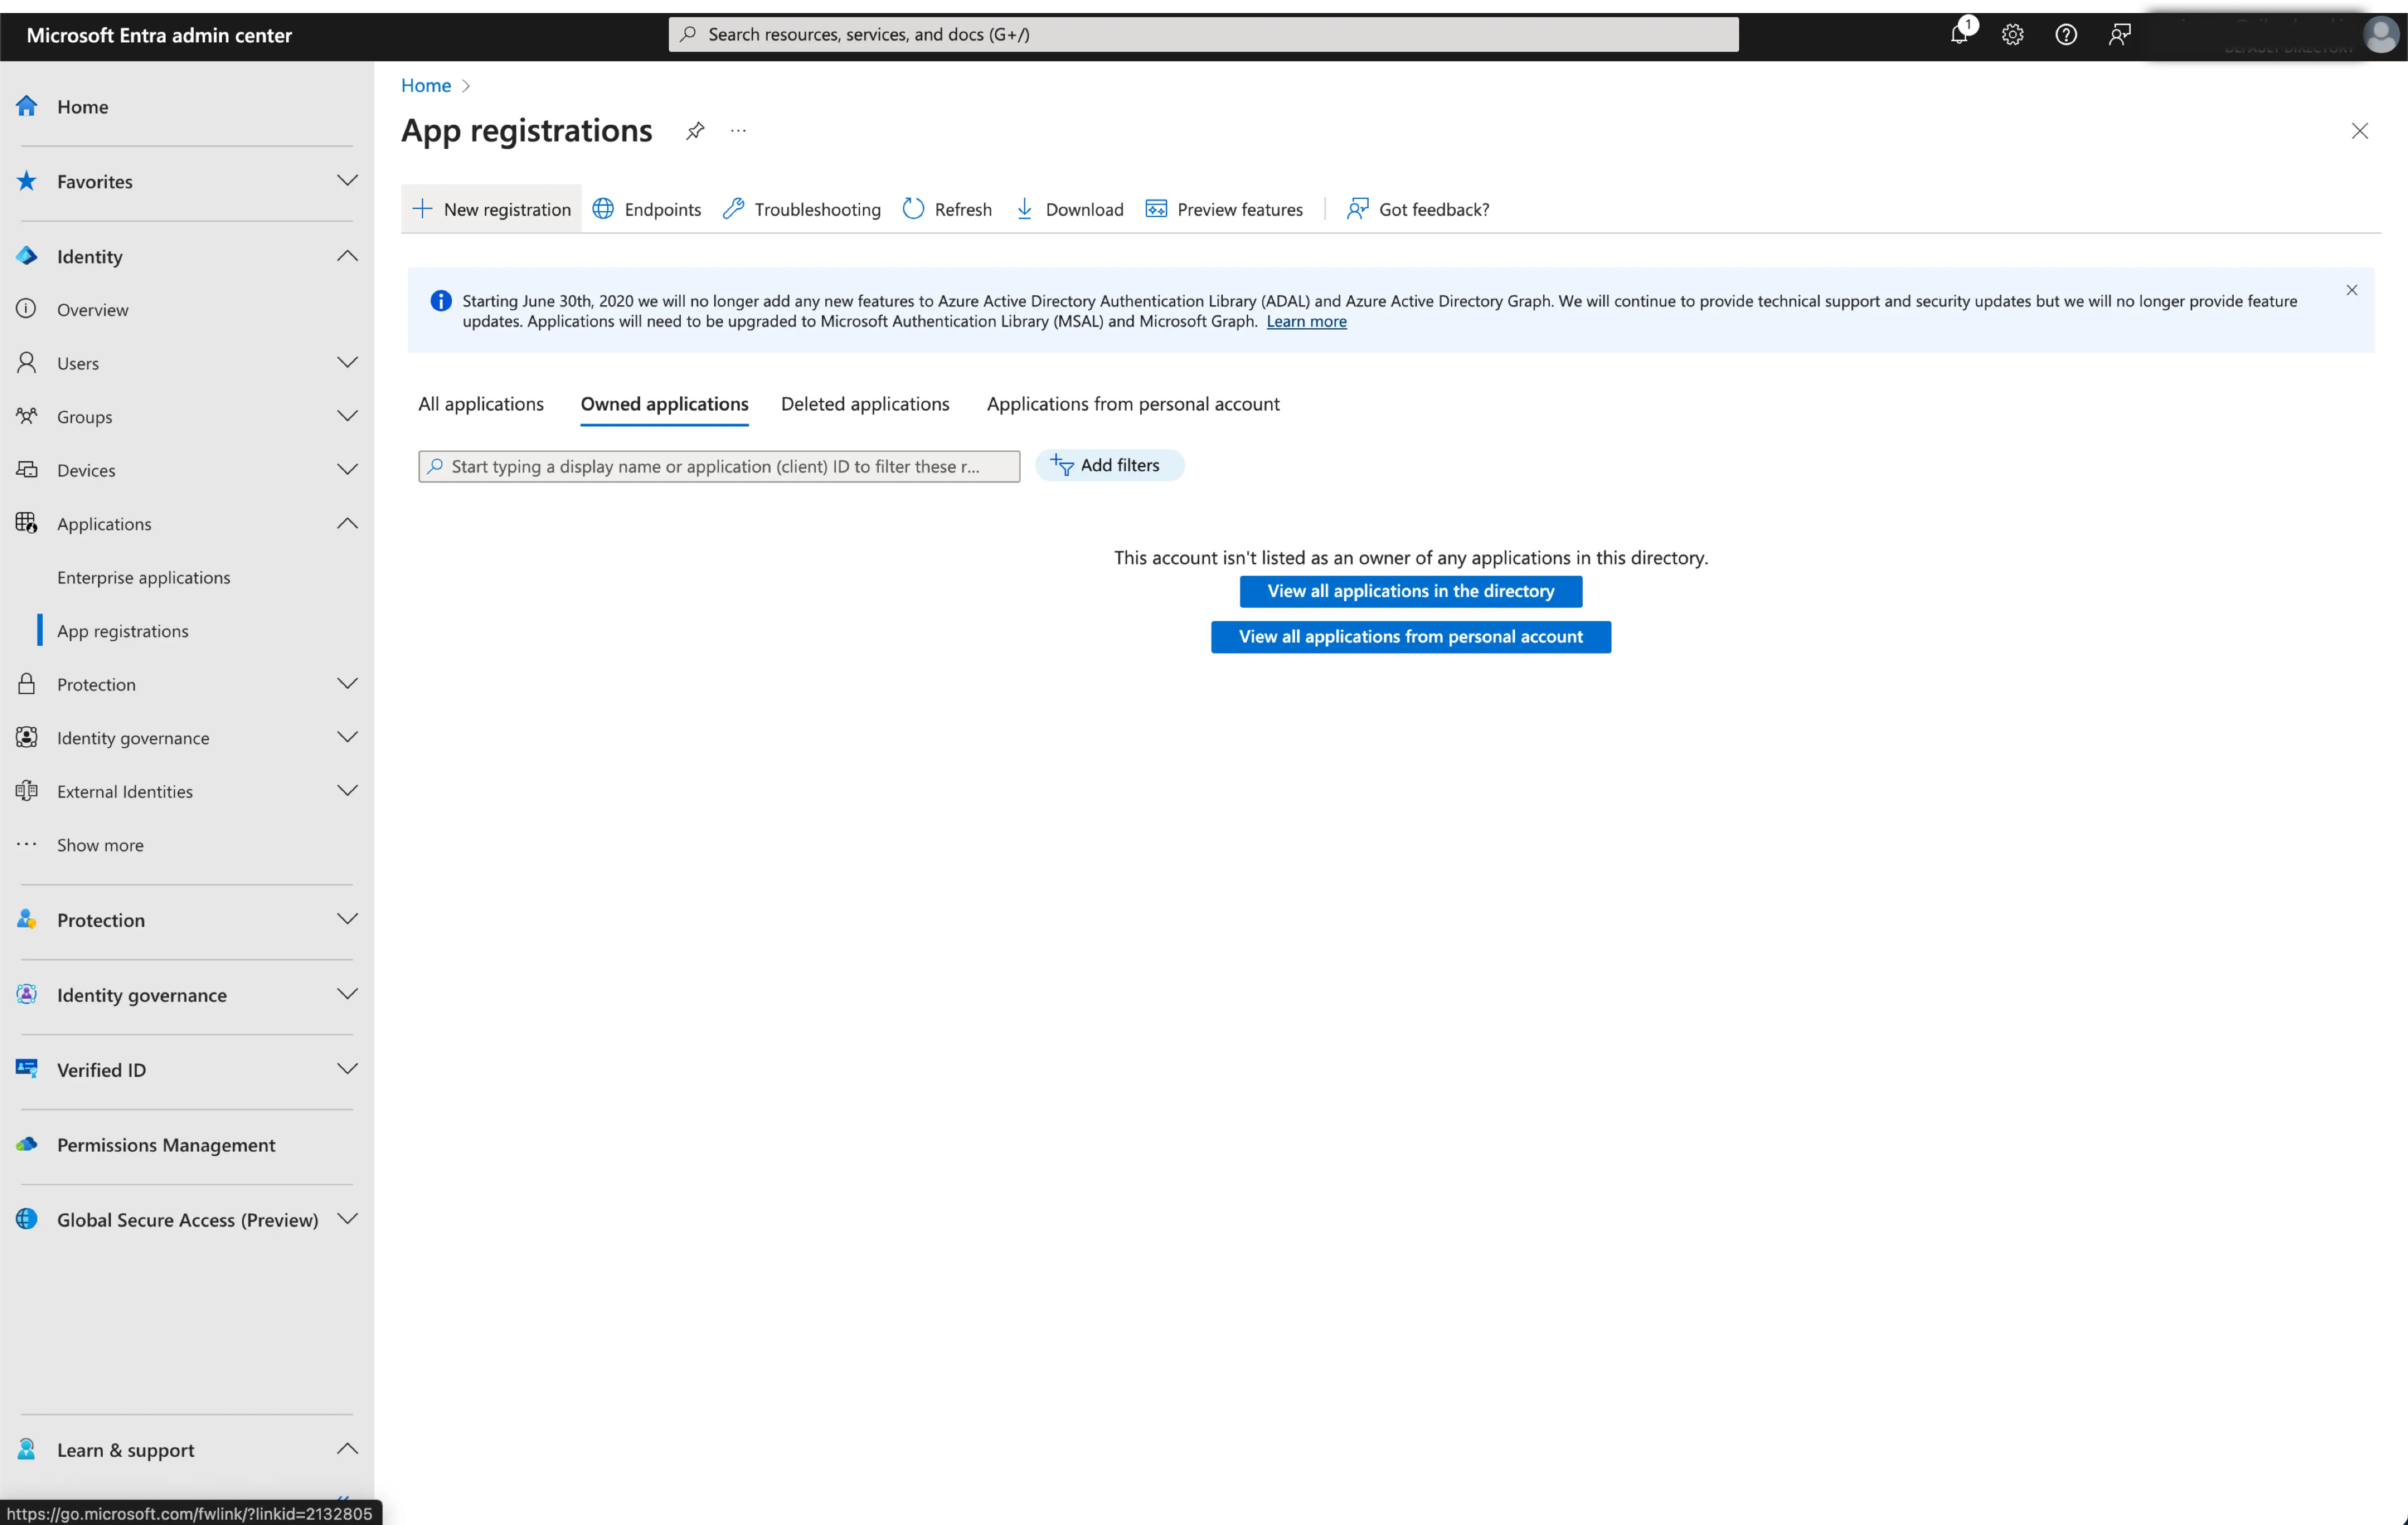
-
Select
New registration. -
Enter the application name and select the appropriate account type for your application.
-
Select
Webas the application platform. -
Copy and paste the
redirect URIfrom Logto's SSO settings page. Theredirect URIis the URL where the user is redirected after they have authenticated with Microsoft Entra ID.
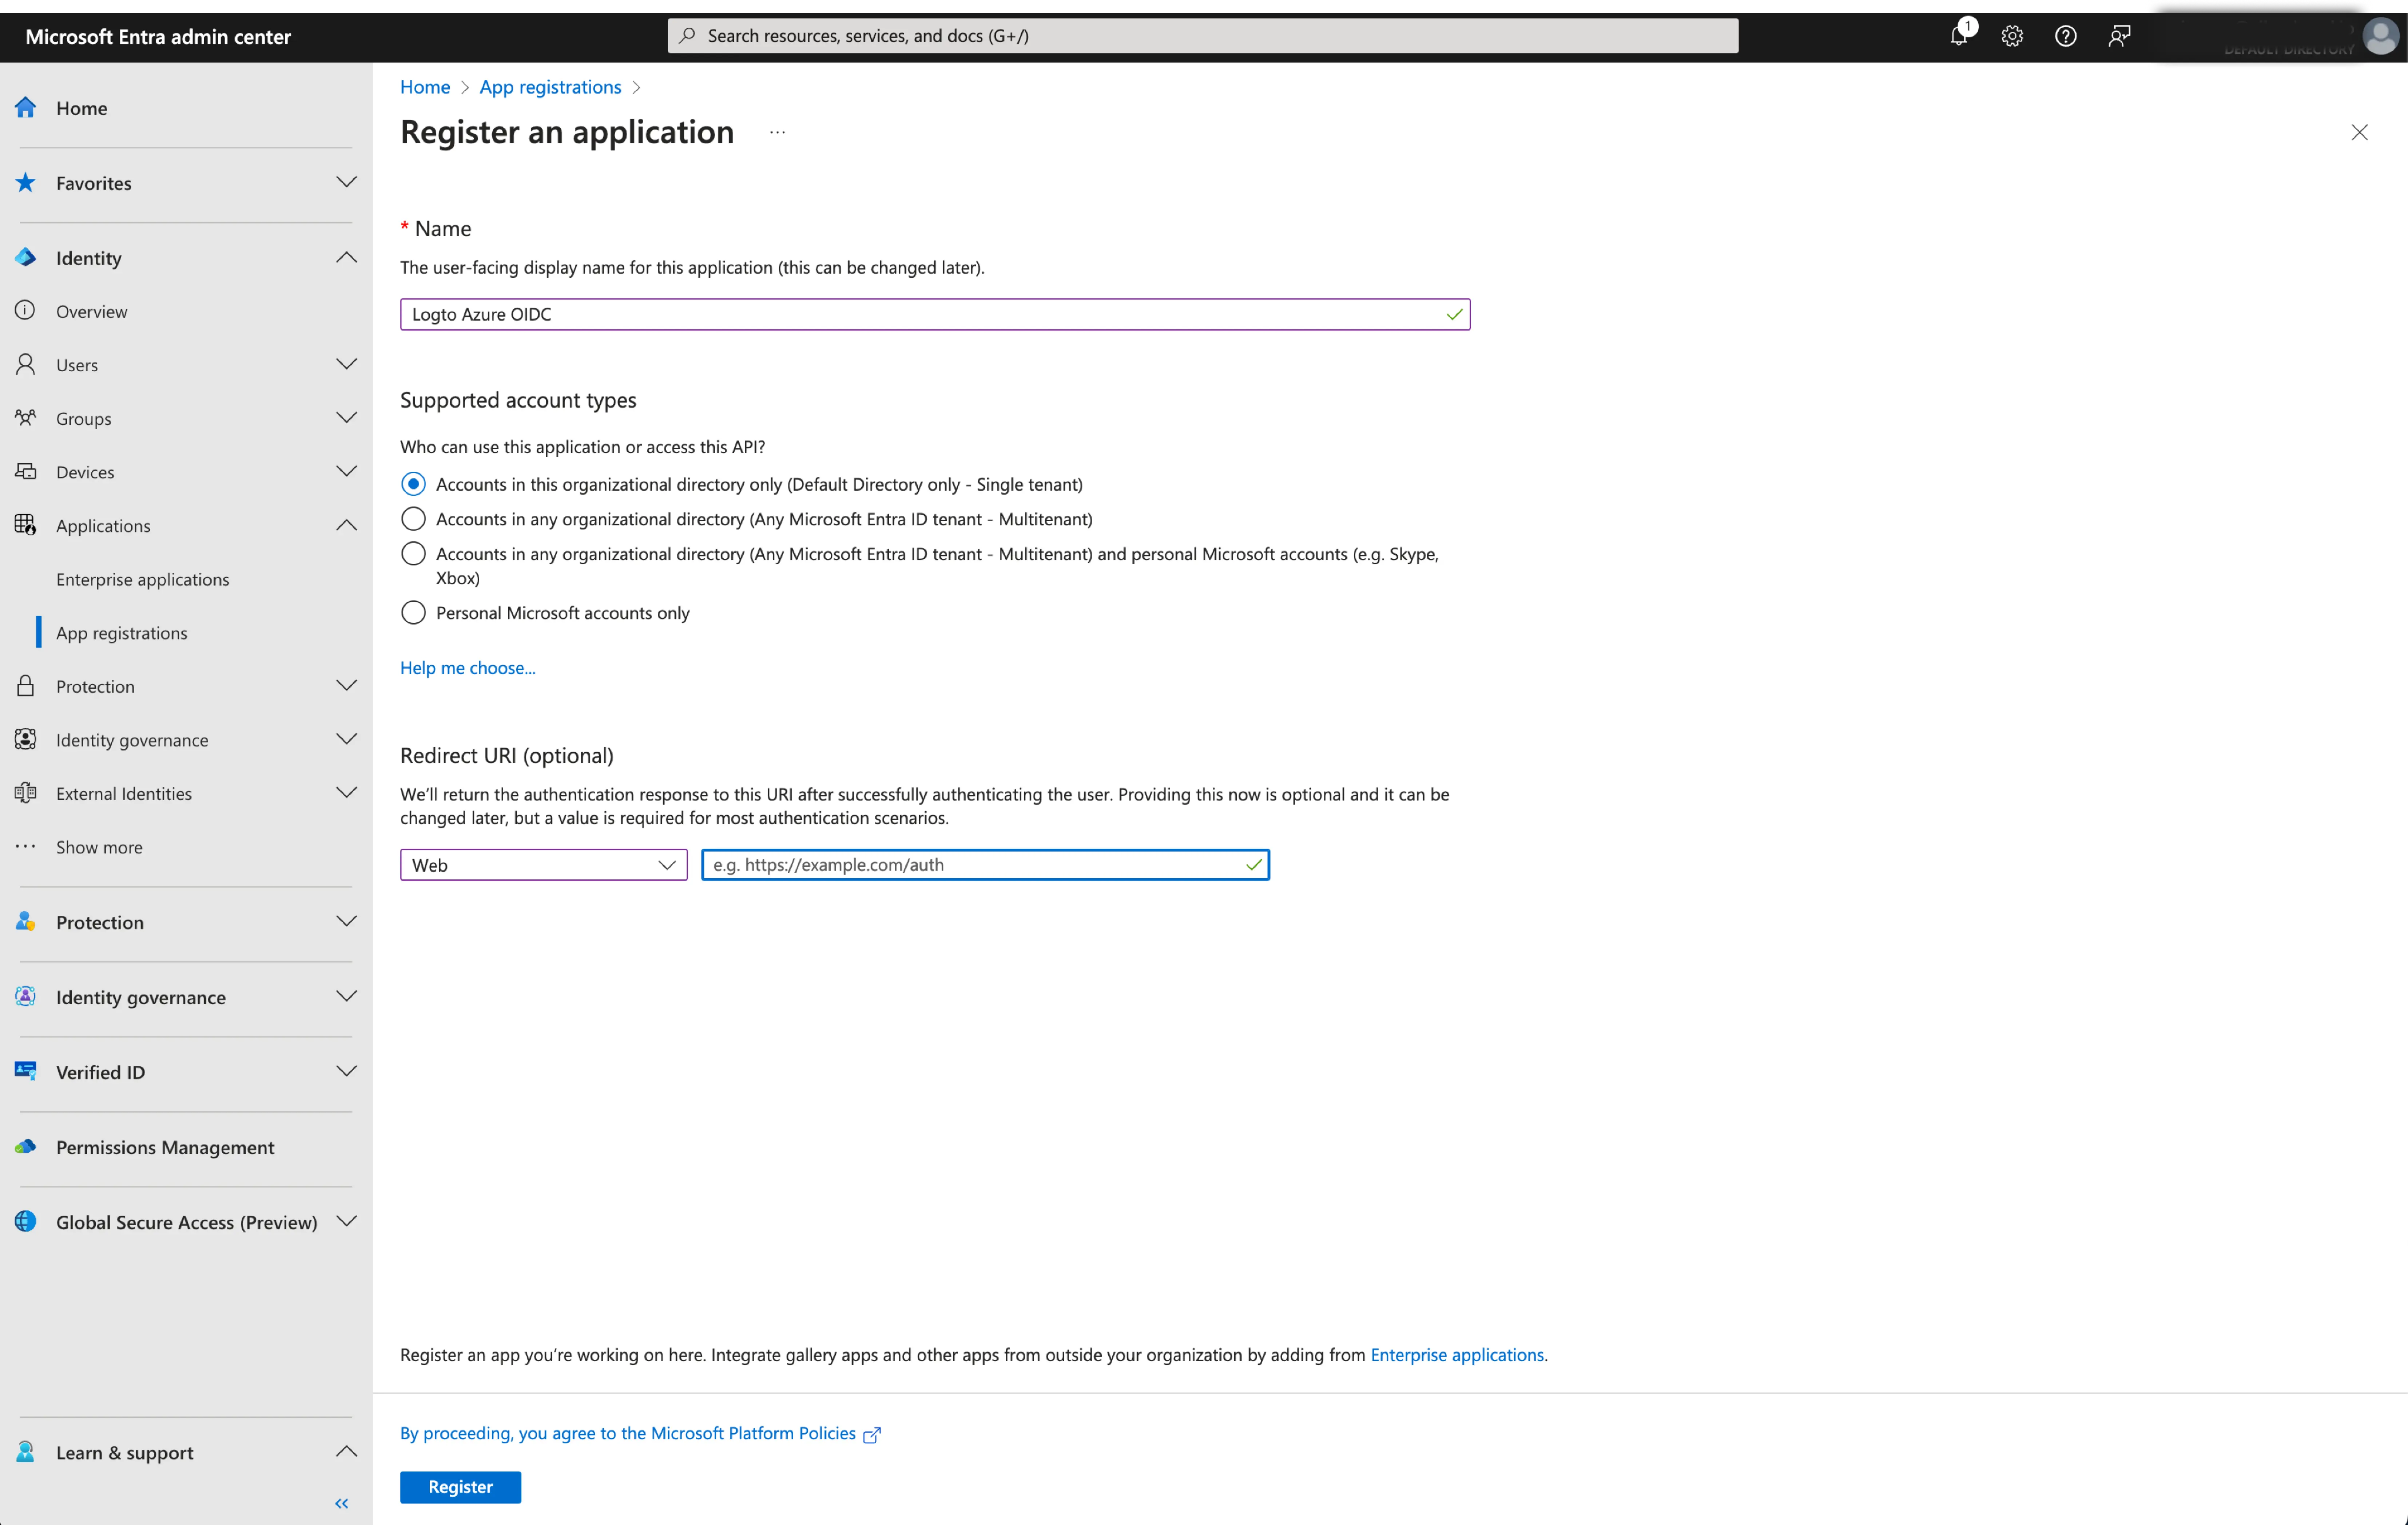
- Click
Registerto create the application.
Step 2: Configure Microsoft Entra ID OIDC SSO at Logto
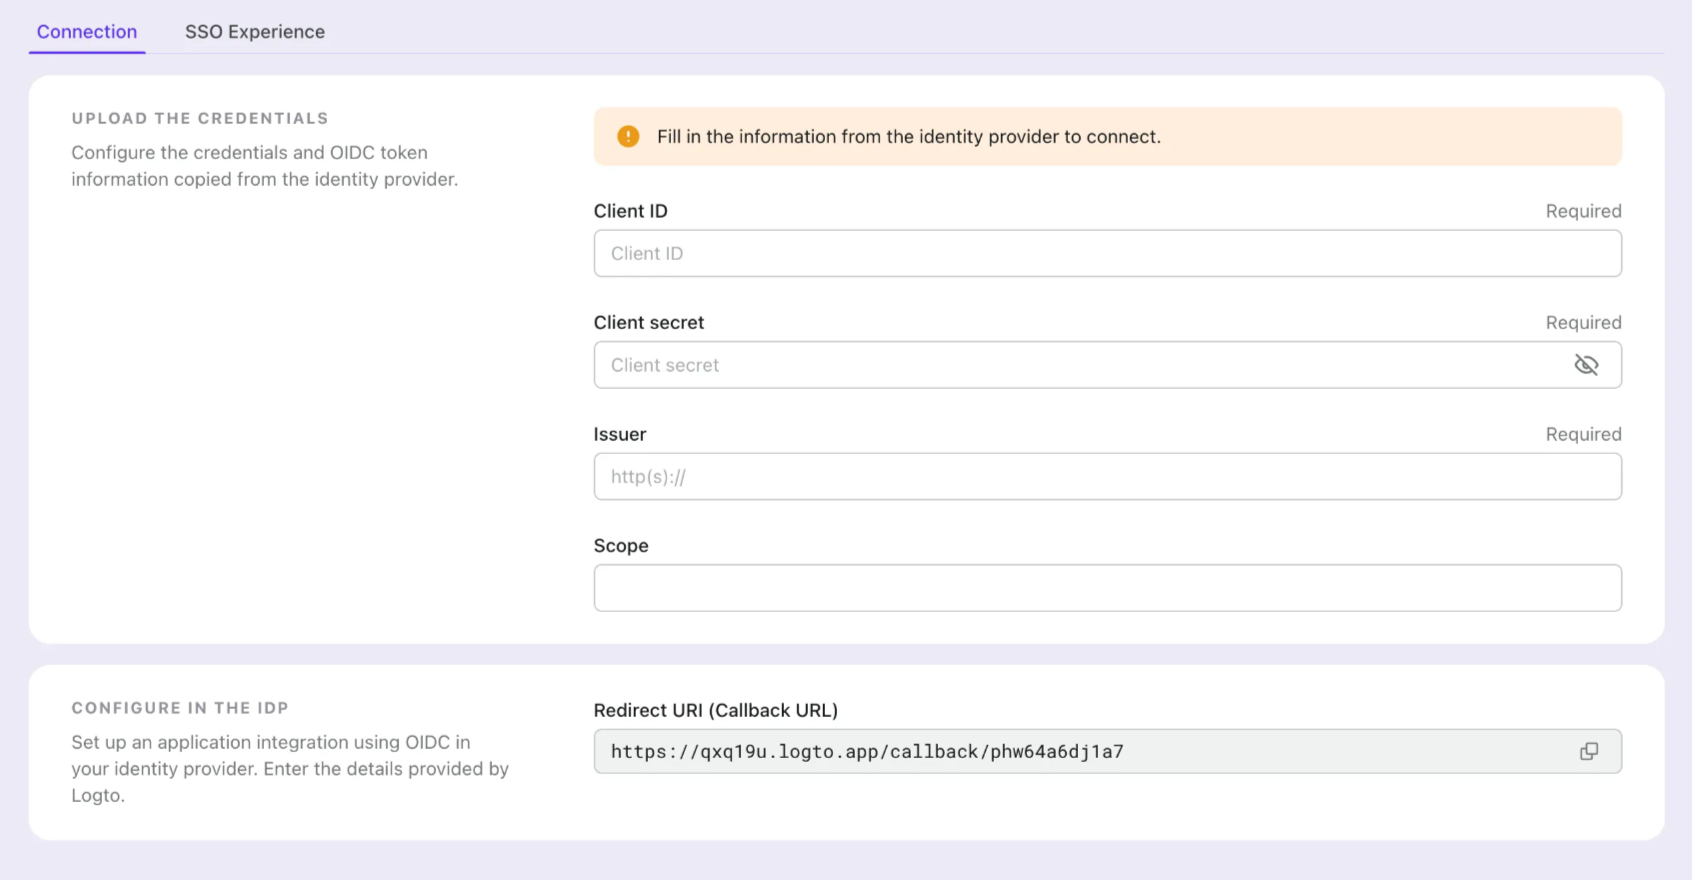
After successfully creating an Microsoft Entra OIDC application, you will need to provide the IdP configurations back to Logto. Navigate to the Connection tab at Logto Console, and fill in the following configurations:
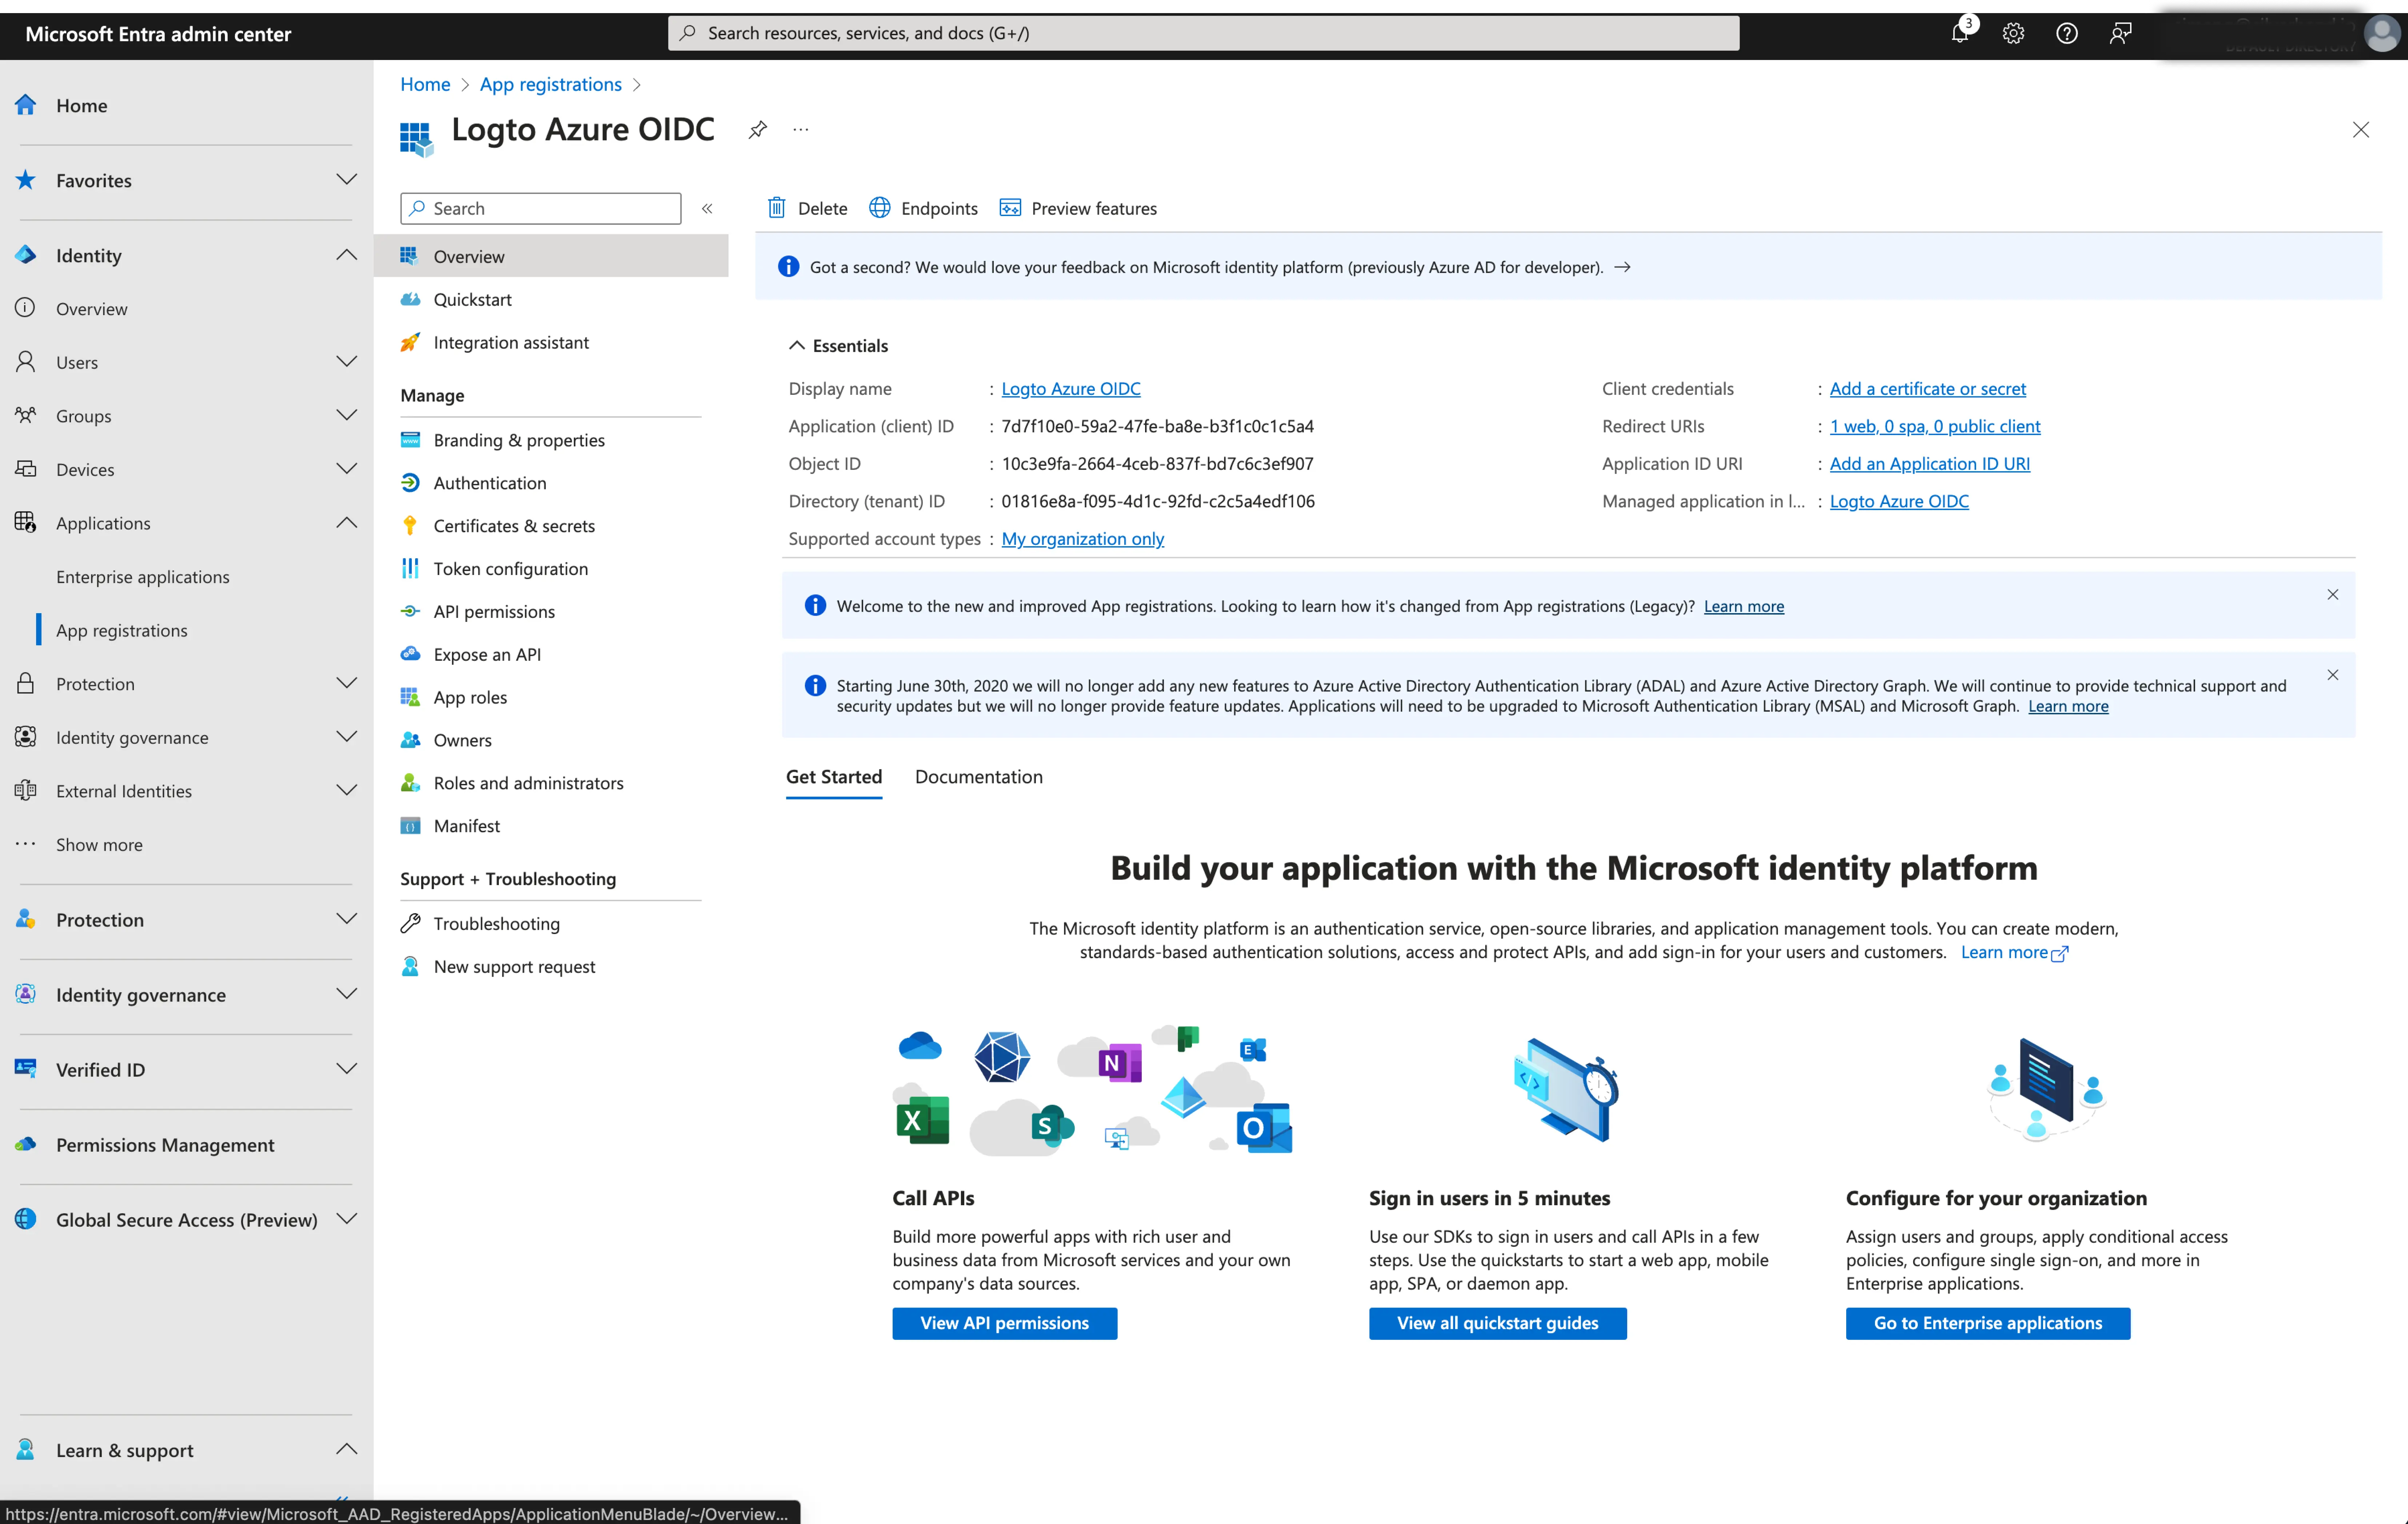
- Client ID: A unique identifier assigned to your OIDC application by the Microsoft Entra. This identifier is used by Logto to identify and authenticate the application during the OIDC flow. You can find it in the application overview page as
Application (client) ID.
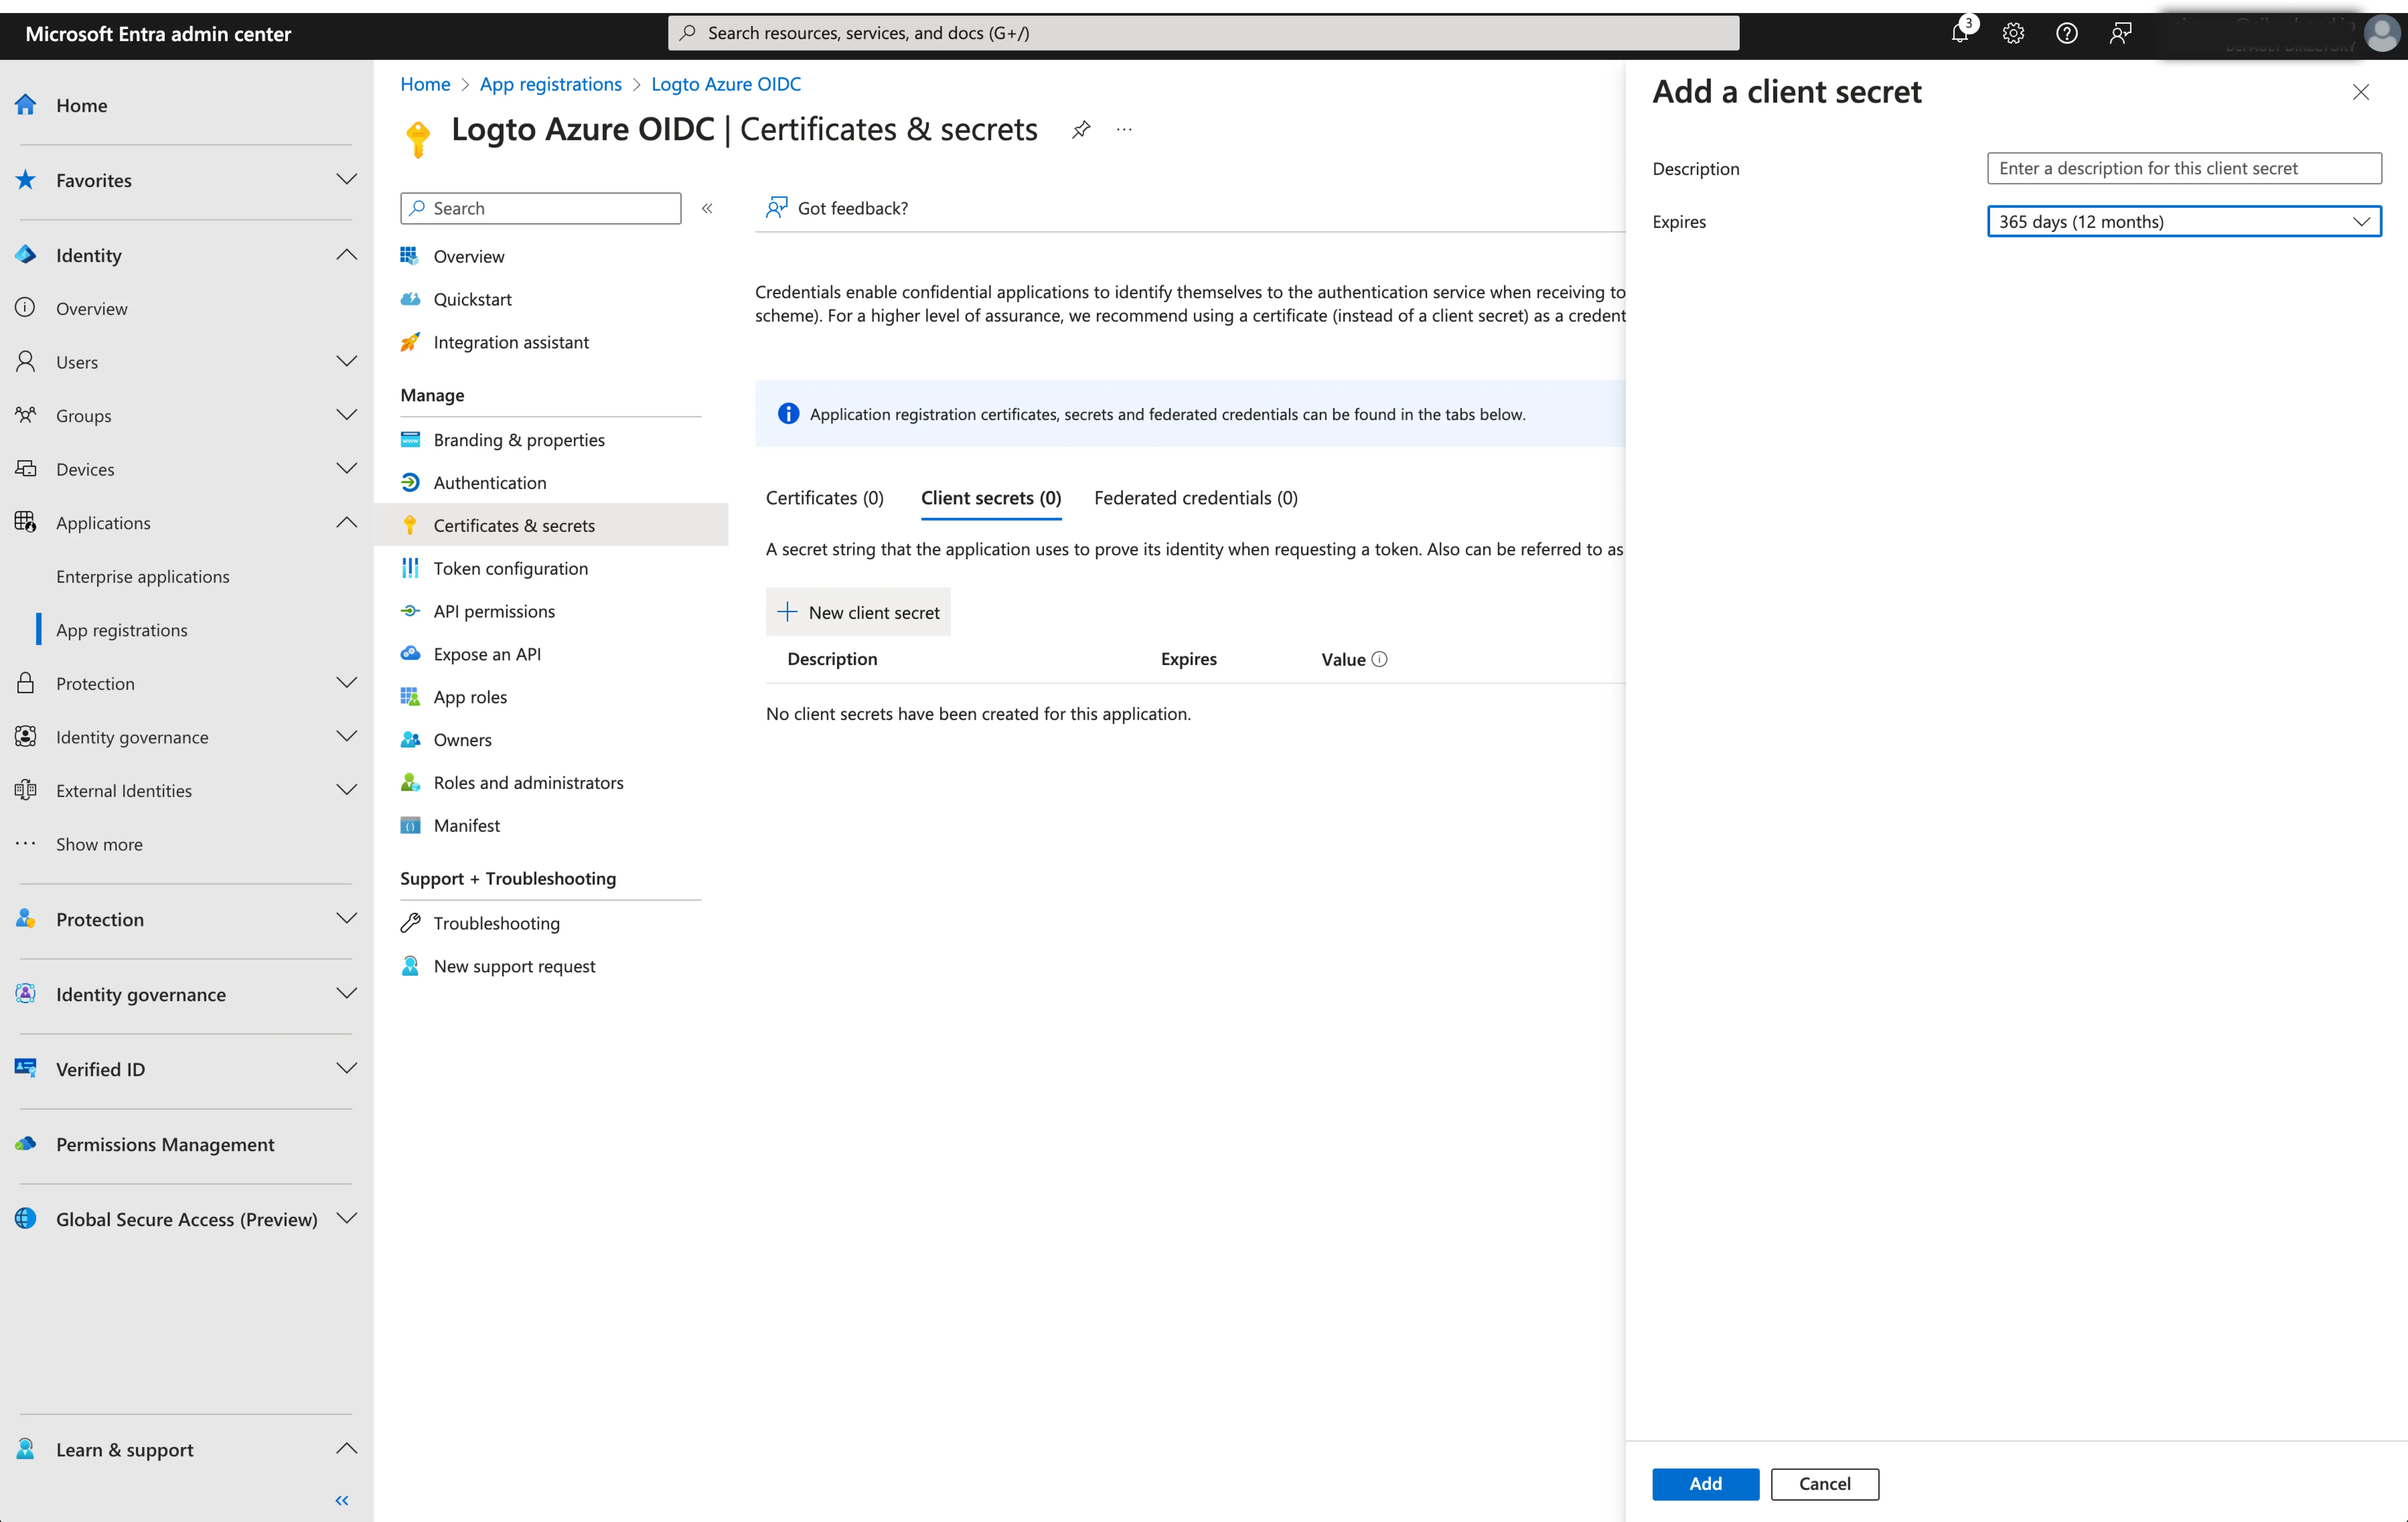
- Client Secret: Create a new client secret and copy the value to Logto. This secret is used to authenticate the OIDC application and secure the communication between Logto and the IdP.
-
Issuer: The issuer URL, a unique identifier for the IdP, specifying the location where the OIDC identity provider can be found. It is a crucial part of the OIDC configuration as it helps Logto discover the necessary endpoints.
Instead of manually provide all these OIDC endpoints, Logto fetch all the required configurations and IdP endpoints automatically. This is done by utilizing the issuer url you provided and making a call to the IdP's discover endpoint.
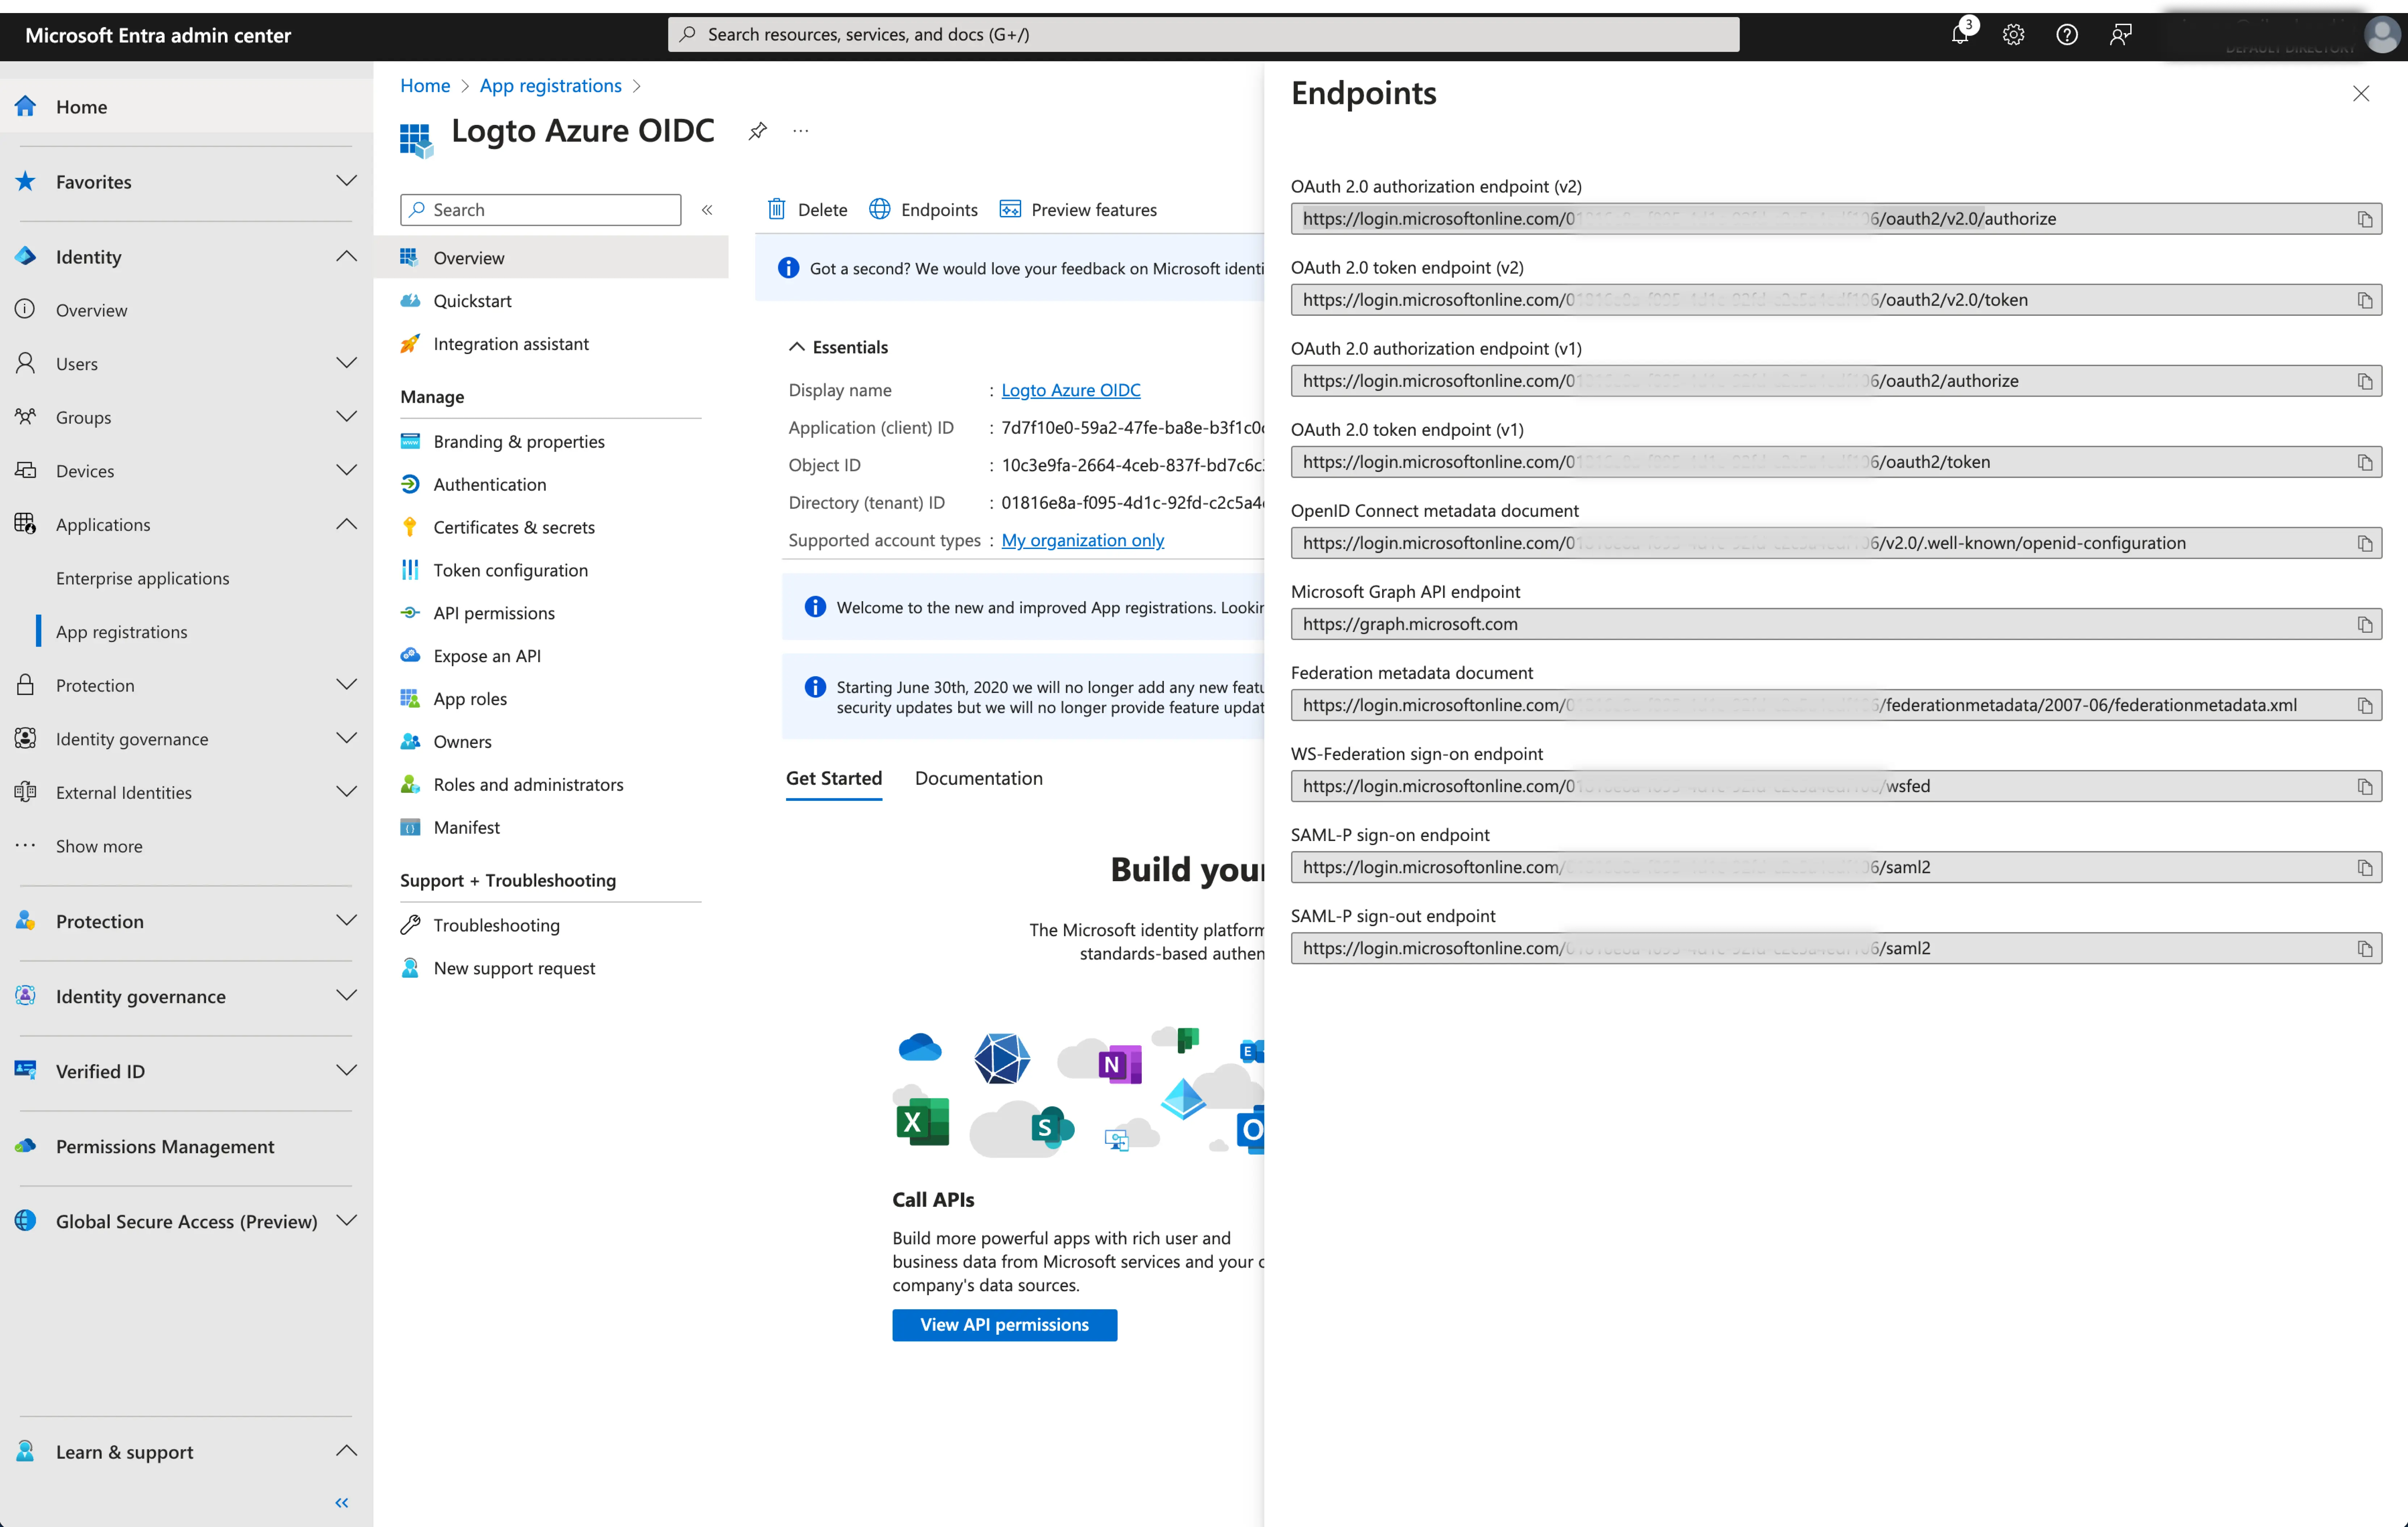
To get the issuer URL, you can find it in the
Endpointssection of the application overview page.Locate the
OpenID Connect metadata documentendpoint and copy the URL WITHOUT the trailing path.well-known/openid-configuration. This is because Logto will automatically append the.well-known/openid-configurationto the issuer URL when fetching the OIDC configurations.
- Scope (Optional): Logto automatically includes the required scopes (
openid,profile, andemail) in all requests. You can specify additional scopes as a space-separated list if your application requires extra permissions or access levels from the IdP.
Click Save to finish the configuration process
Step 3: Additional scopes (Optional)
Scopes define the permissions your app requests from users and control which data your app can access from their Microsoft Entra ID accounts. Requesting Microsoft Graph permissions requires configuration on both sides:
In Microsoft Entra admin center:
- Navigate to Microsoft Entra ID > App registrations and select your application.
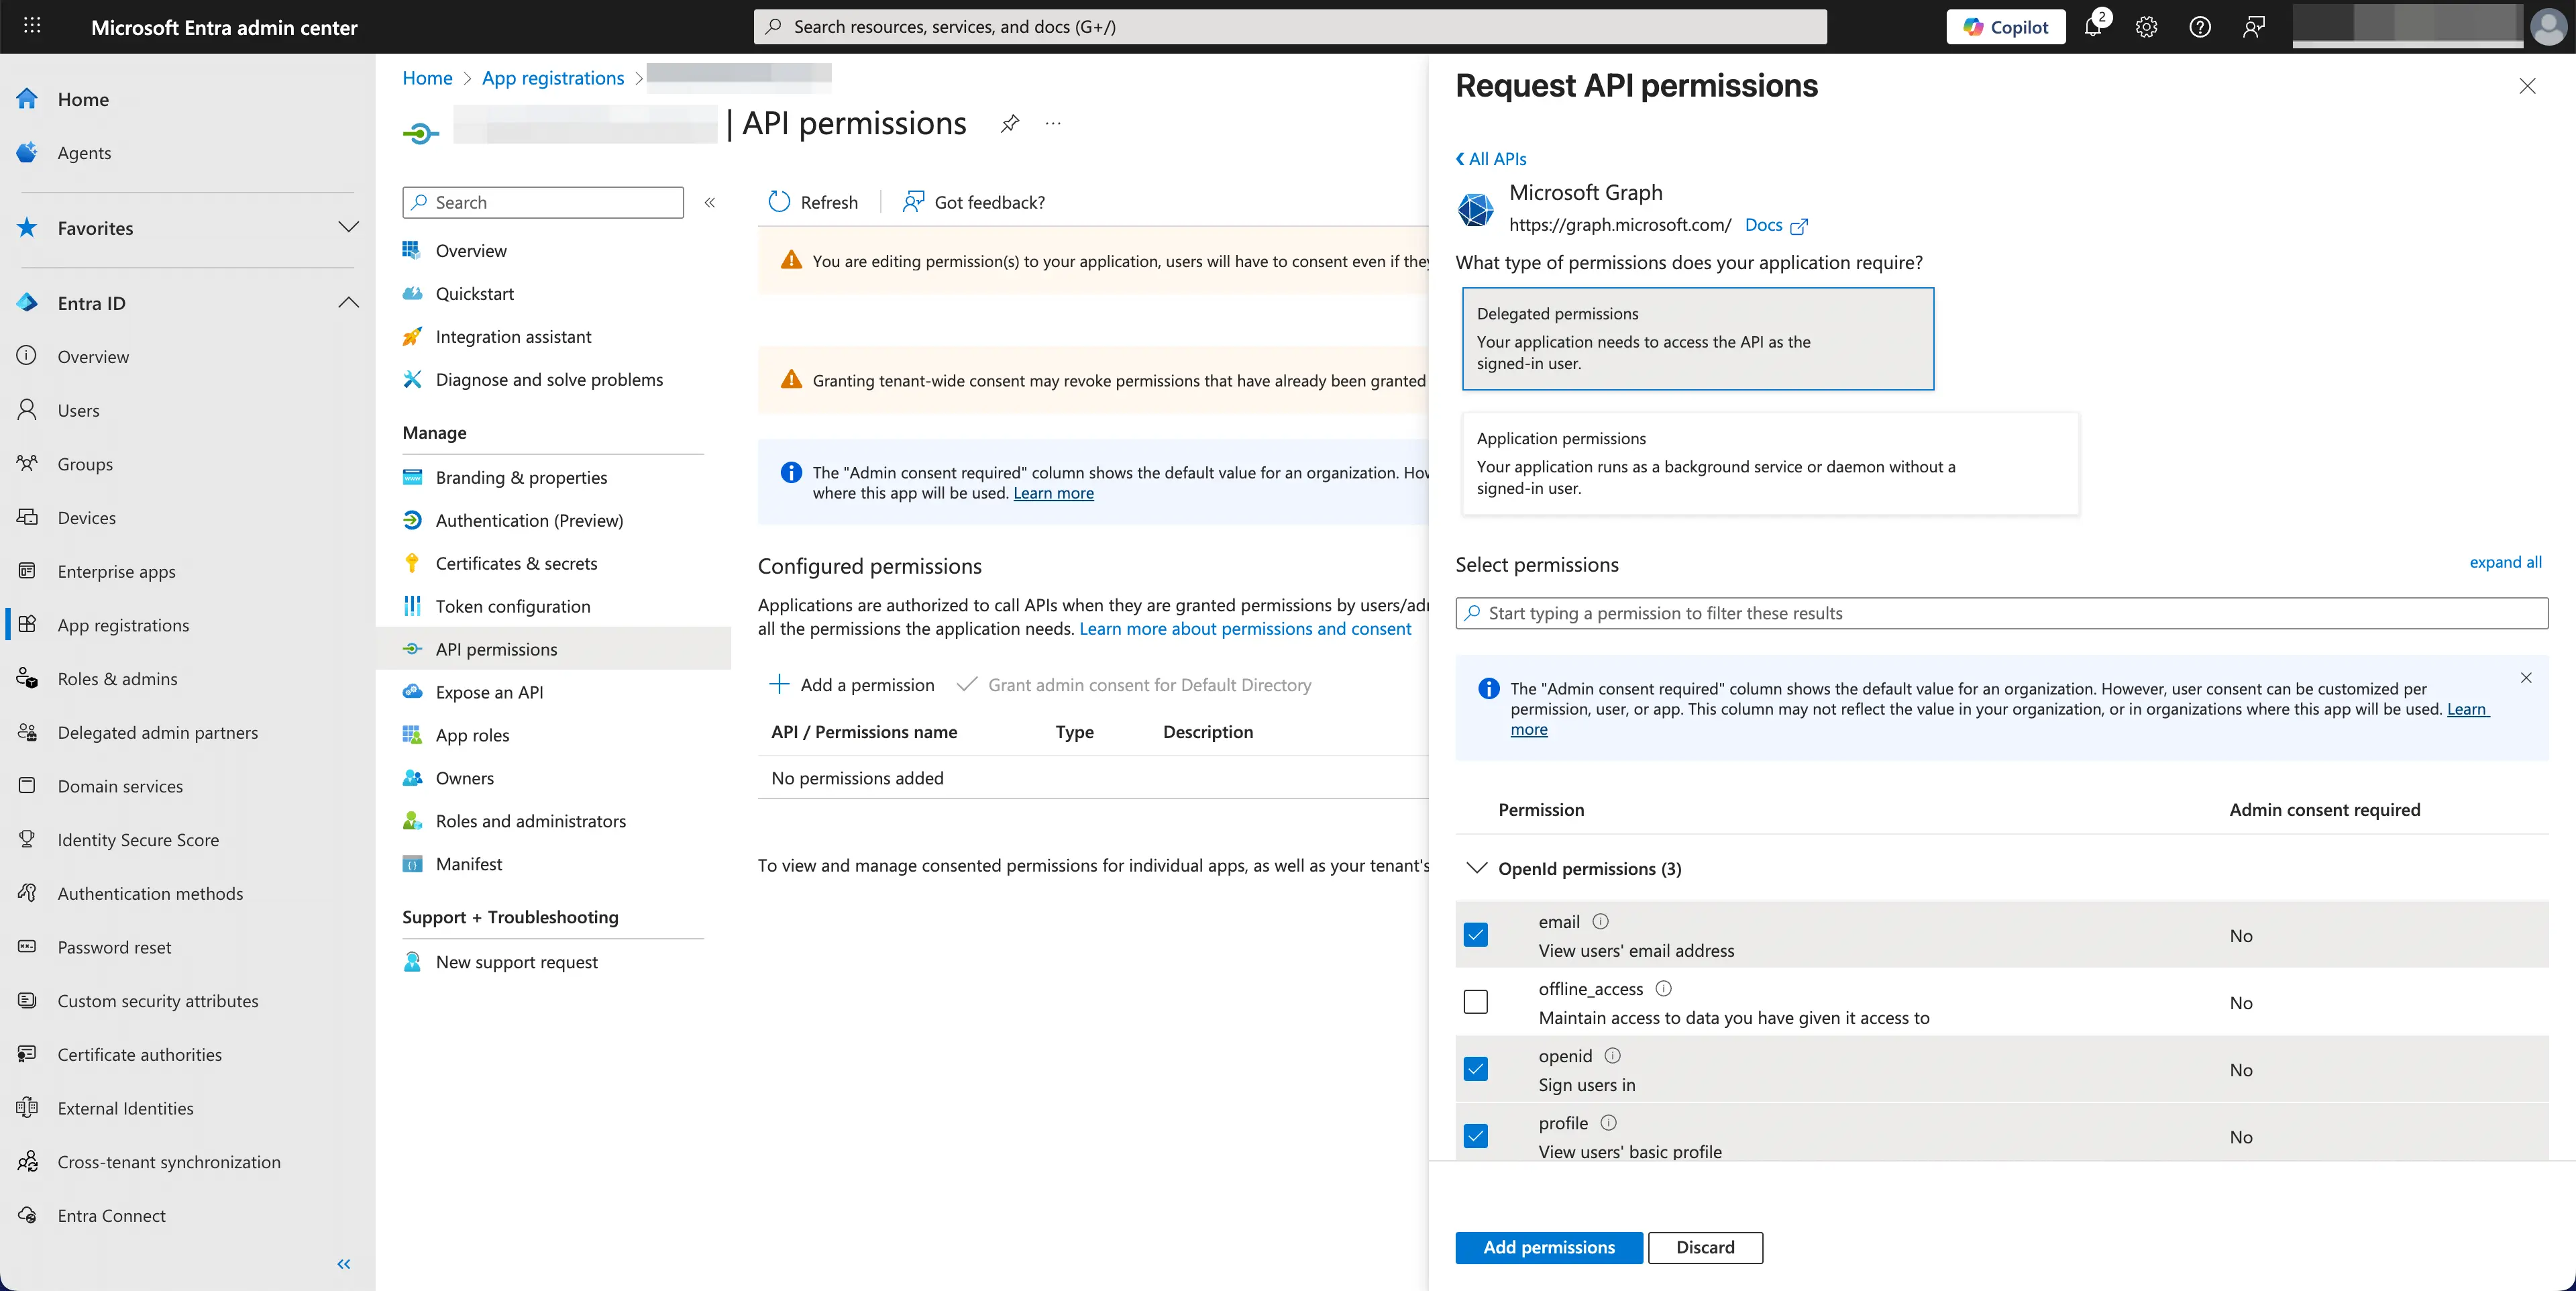
- Go to API permissions > Add a permission > Microsoft Graph > Delegated permissions.
- Select only the permissions your app requires:
- OpenID permissions:
openid(Required) - Sign users inprofile(Required) - View users' basic profileemail(Required) - View users' email addressoffline_access(Optional) - Required only if you enable Store tokens for persistent API access in the Logto connector and need to obtain refresh tokens for long-lived access to Microsoft Graph APIs.
- API access (Optional): Add any additional permissions needed for your app. Common Microsoft Graph permissions include
Mail.Read,Calendars.Read,Files.Read, etc. Browse the Microsoft Graph permissions reference to find available permissions.
- OpenID permissions:
- Click Add permissions to confirm the selection.
- If your app requires admin consent for certain permissions, click Grant admin consent for [Your Organization].
In Logto Microsoft Entra ID connector:
- Logto automatically includes
openid,profile, andemailscopes to retrieve basic user identity information. You can leave theScopesfield blank if you only need basic user information. - Add
offline_accessto theScopesfield if you plan to store tokens for persistent API access. This scope enables refresh tokens for long-lived API access. - Add additional scopes (separated by spaces) in the
Scopesfield to request more data from Microsoft Graph. Use standard scope names, for example:User.Read Mail.Read Calendars.Read
If your app requests these scopes to access the Microsoft Graph API and perform actions, make sure to enable Store tokens for persistent API access in Logto Microsoft Entra ID connector. See the next section for details.
Step 4: Store tokens to access Microsoft APIs (Optional)
If you want to access Microsoft Graph APIs and perform actions with user authorization, Logto needs to get specific API scopes and store tokens.
- Add the required scopes in your Microsoft Entra admin center API permissions configuration and Logto Microsoft Entra ID connector.
- Enable Store tokens for persistent API access in Logto Microsoft Entra ID connector. Logto will securely store Microsoft access and refresh tokens in the Secret Vault.
- To ensure refresh tokens are returned, add the
offline_accessscope to your Microsoft Entra ID application permissions and include it in your Logto Microsoft Entra ID connector scopes. This scope allows your application to maintain access to resources for extended periods.
Step 5: Set email domains and enable the SSO connector
Provide the email domains of your organization on the connector experience tab. This will enable the SSO connector as an authentication method for those users.
Users with email addresses in the specified domains will be exclusively limited to use your SSO connector as their only authentication method.
Save your configuration
Double check you have filled out necessary values in the Logto connector configuration area. Click "Save and Done" (or "Save changes") and the Microsoft Entra ID OIDC enterprise SSO connector should be available now.
Enable Microsoft Entra ID OIDC enterprise SSO connector in Sign-in Experience
You don’t need to configure enterprise connectors individually, Logto simplifies SSO integration into your applications with just one click.
- Navigate to: Console > Sign-in & account > Sign-up and sign-in.
- Enable the "Enterprise SSO" toggle.
- Save changes.
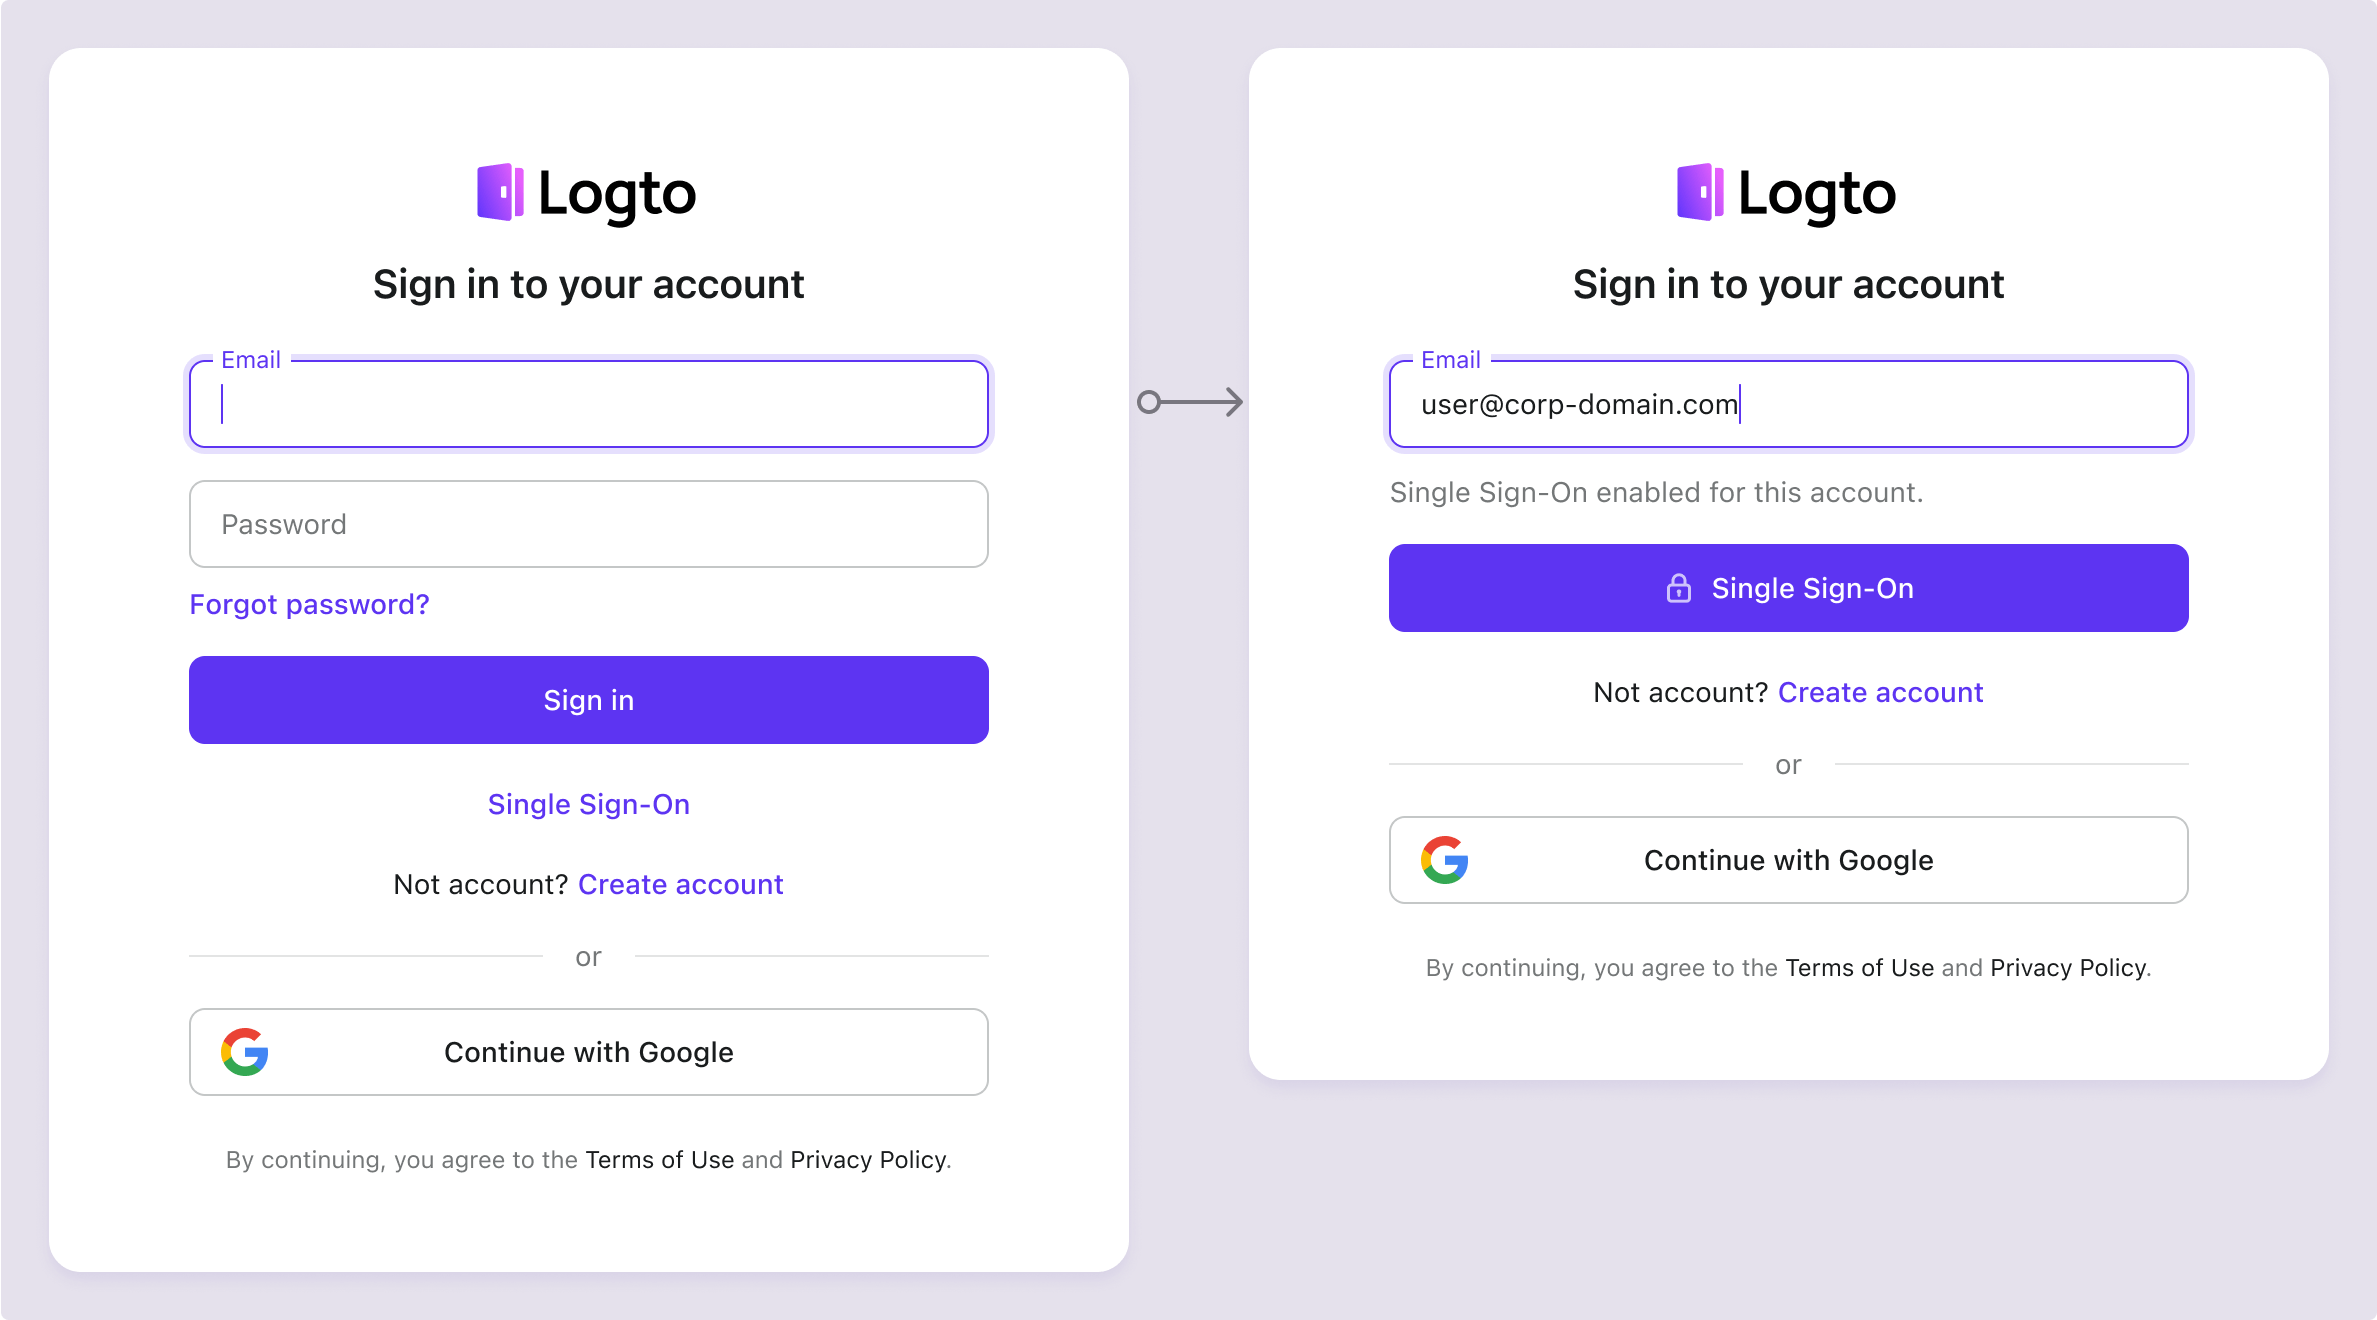
Once enabled, a "Single Sign-On" button will appear on your sign-in page. Enterprise users with SSO-enabled email domains can access your services using their enterprise identity providers (IdPs).
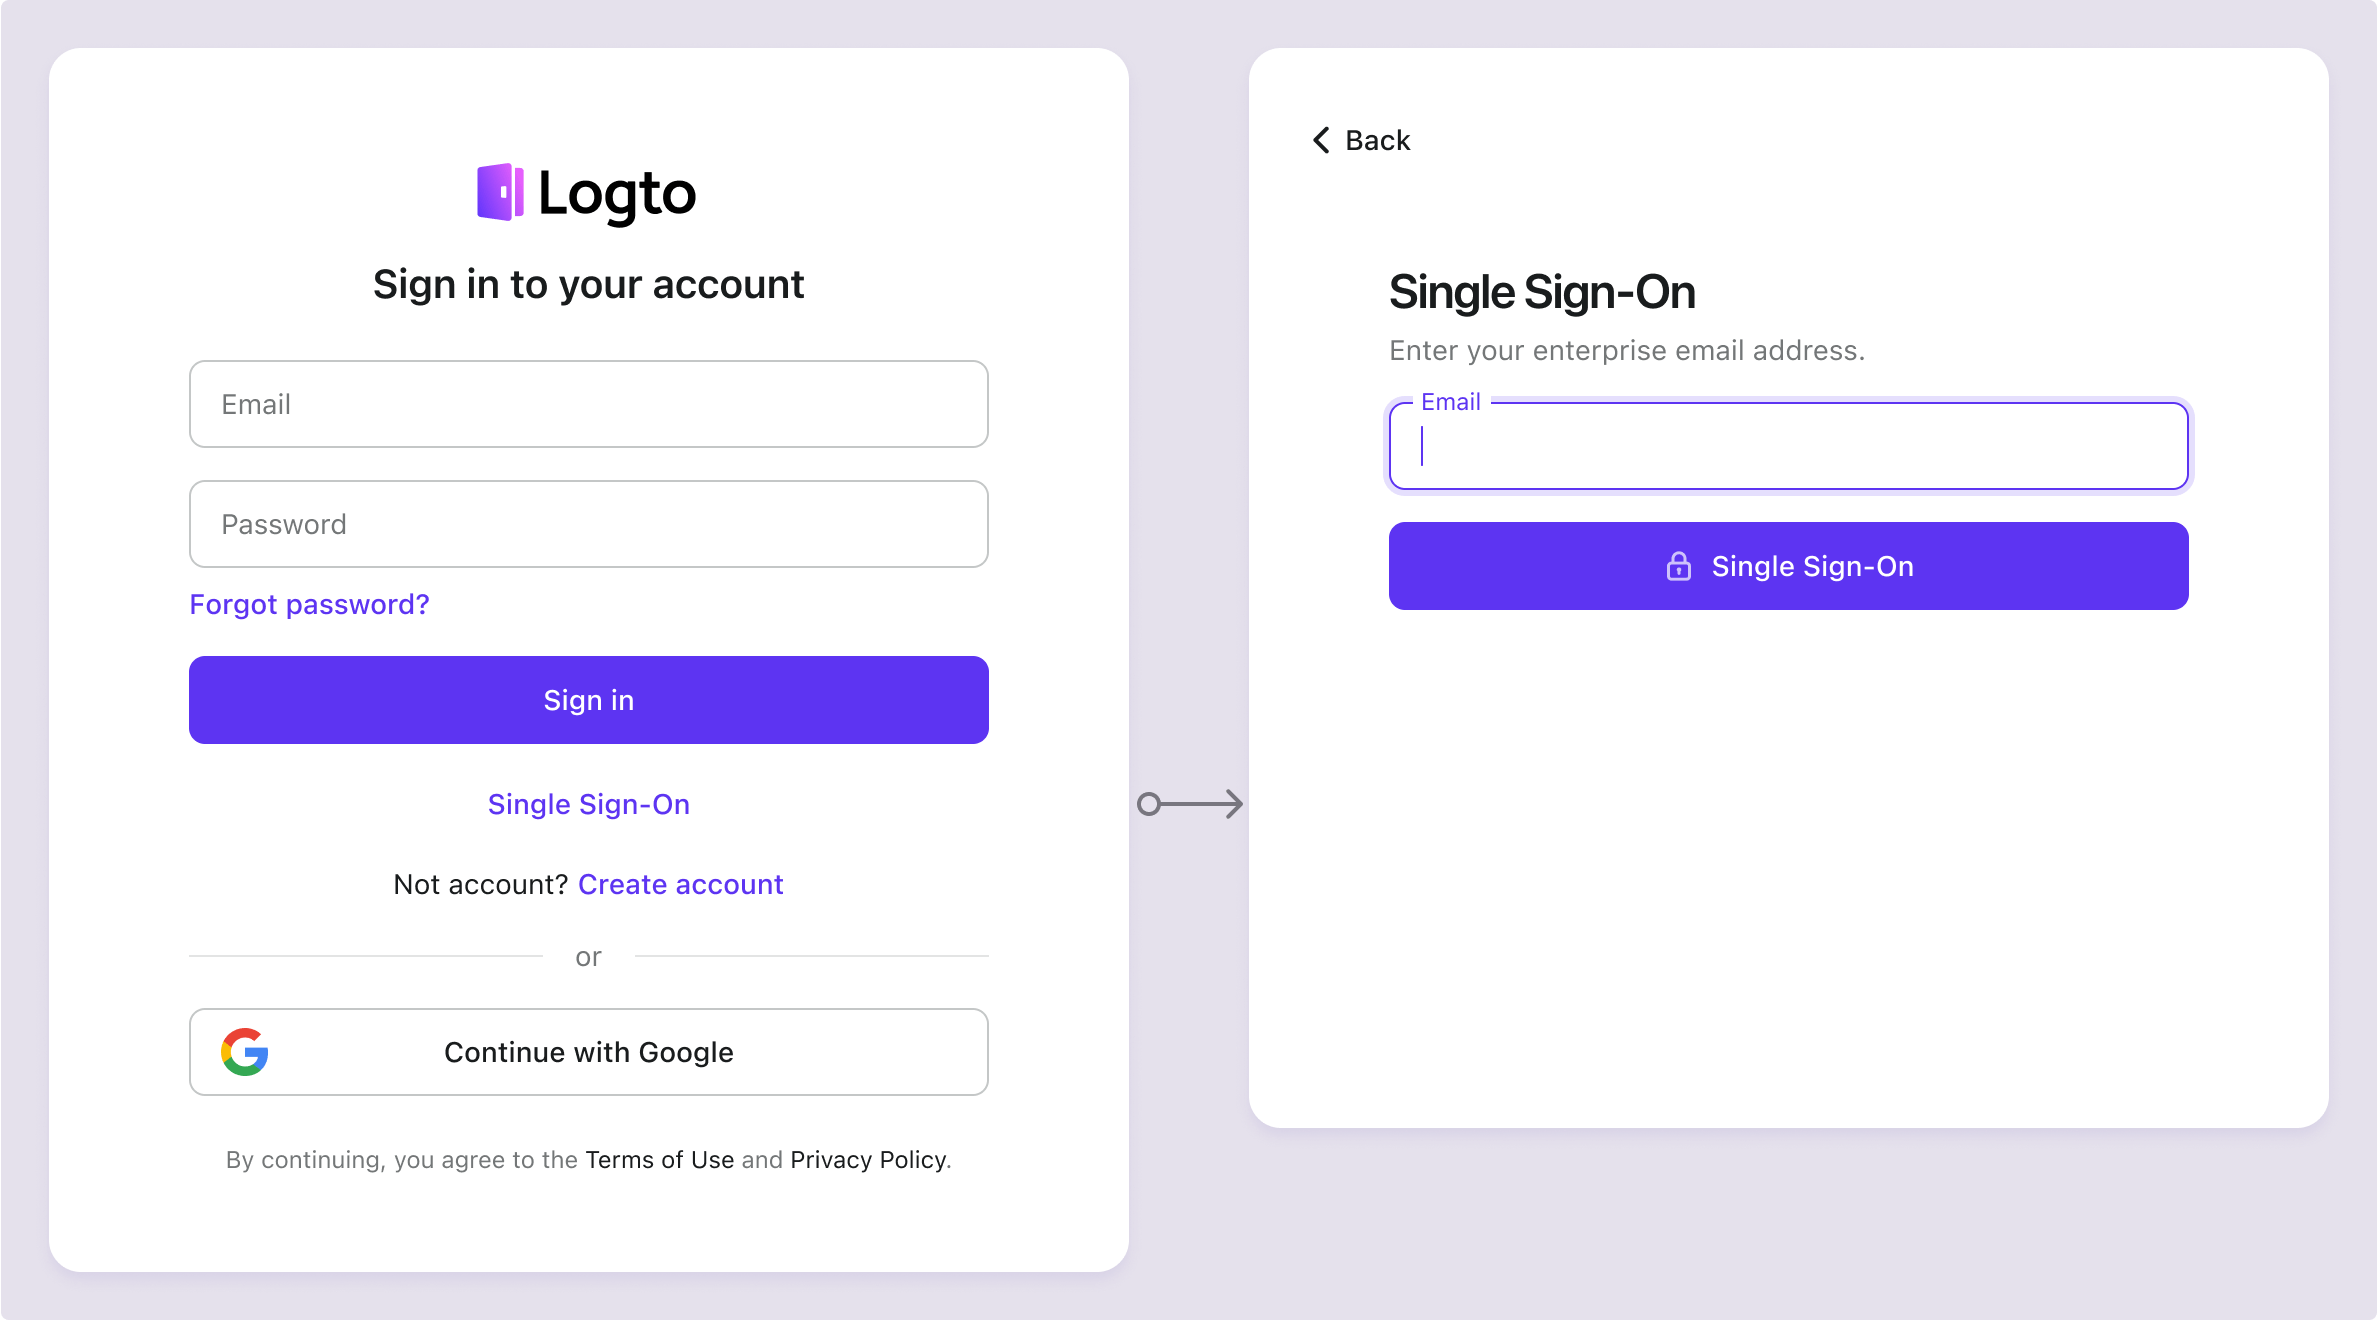
To learn more about the SSO user experience, including SP-initiated SSO and IdP-initiated SSO, refer to User flows: Enterprise SSO.
Testing and Validation
Return to your iOS (Swift) app. You should now be able to sign in with Microsoft Entra ID OIDC enterprise SSO. Enjoy!
Further readings
End-user flows: Logto provides a out-of-the-box authentication flows including MFA and enterprise SSO, along with powerful APIs for flexible implementation of account settings, security verification, and multi-tenant experience.
Authorization: Authorization defines the actions a user can do or resources they can access after being authenticated. Explore how to protect your API for native and single-page applications and implement Role-based Access Control (RBAC).
Organizations: Particularly effective in multi-tenant SaaS and B2B apps, the organization feature enable tenant creation, member management, organization-level RBAC, and just-in-time-provisioning.
Customer IAM series Our serial blog posts about Customer (or Consumer) Identity and Access Management, from 101 to advanced topics and beyond.